Small Crossover Bag August 16, 2019
It is extremely difficult to
find a pattern that is just perfect for you.
There always seems to be something missing or a feature included that is
not wanted. That is why we need to examine a pattern and decide which features we want to keep and which ones
we want to delete. That was the process
I recently encountered when I decided to make a small crossover bag to hold
cash, credit cards, I
identification, and phone.
identification, and phone.
I had an instruction sheet
for a simple small crossover bag that was compliments of Fields Fabric from
several years ago. The small bag
(approximately 7”x 8”) was made from three pieces of color coordinated
fabric. The strap was attached to swivel
hoops that clipped onto D rings. The D
rings were attached to small fabric loops sewn to the top of the bag. The
fold-over flap of the bag closed with a magnetic bag closure. The bag was bound around all outside edges
with bias tape made from one of the coordinated fabrics. The bag appeared to be quick to make and
could accommodate everything I needed to take with me for a quick trip to the grocery
store or an all day trip to a sewing expo.
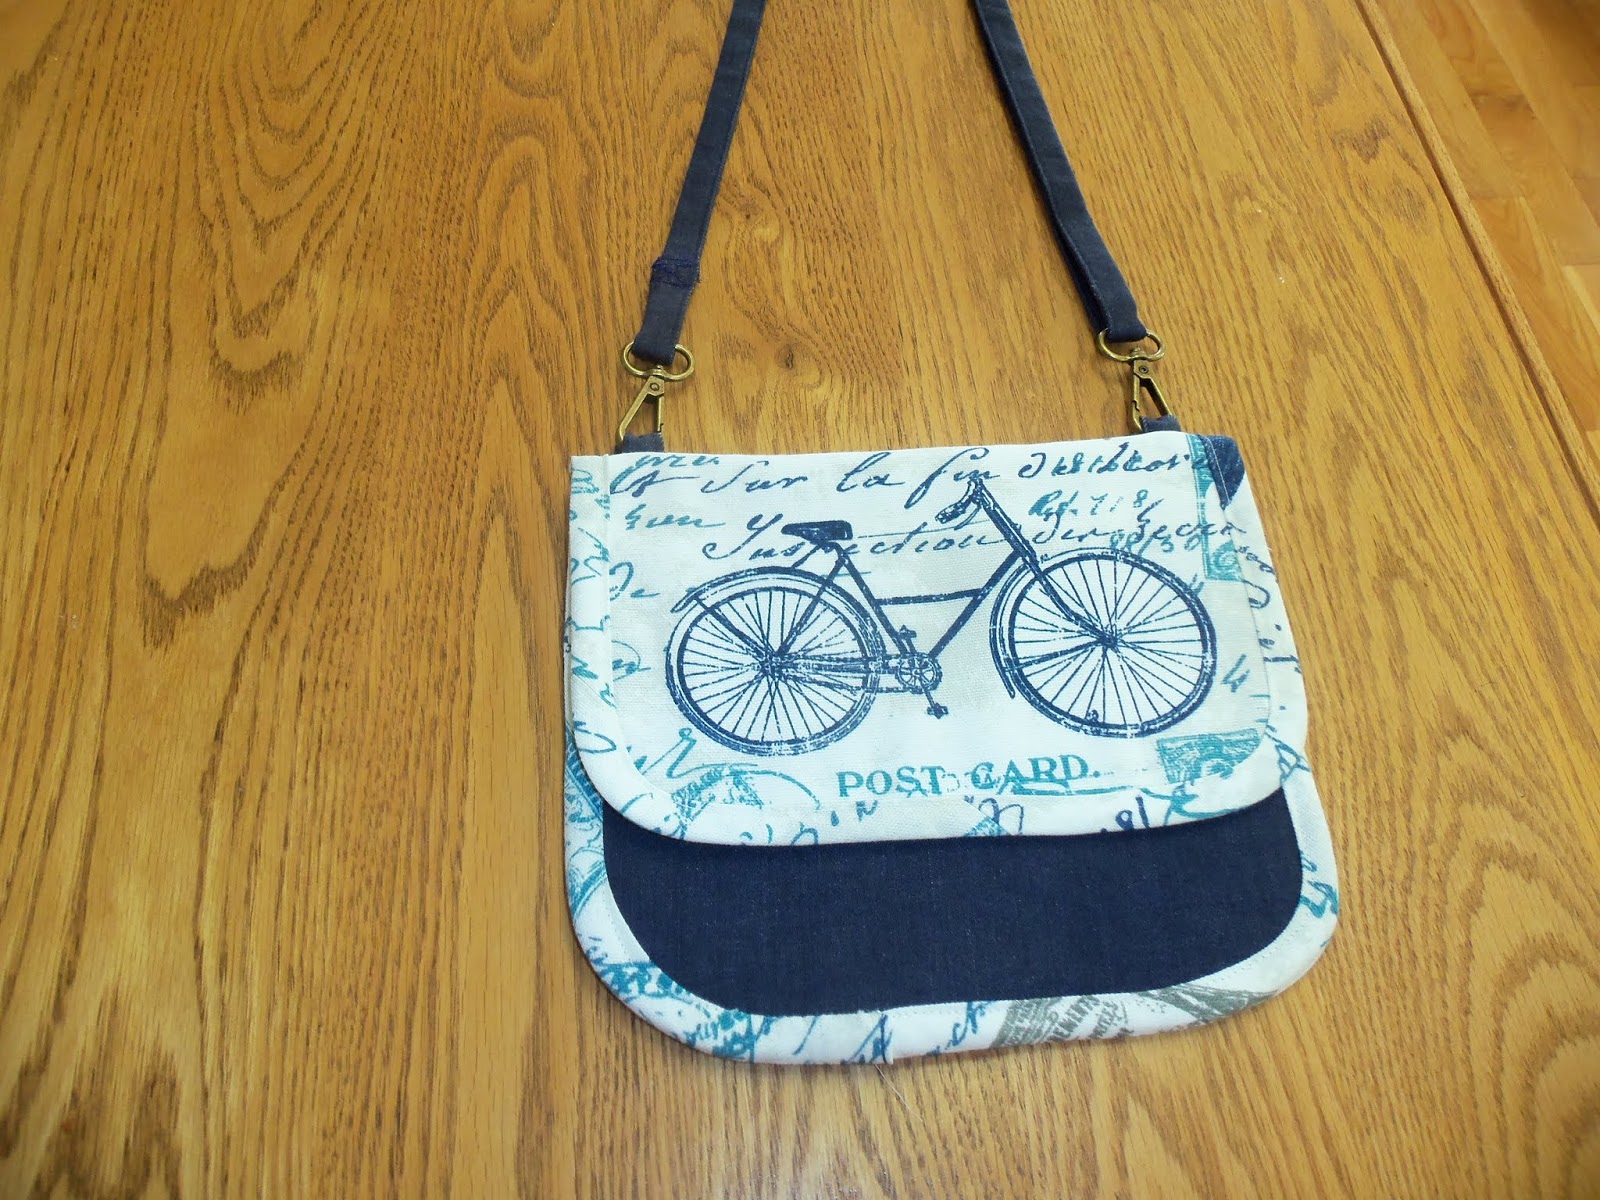
After scrutinizing the instructions, I decided to make a bag very similar to the pattern and then I would make another
one and add or delete features that might work better for me. I had three pieces of color- coordinated
fabric in my stash. I made a couple of
small changes to the first bag I made. Instead of using a magnetic closure, I used a
snap from Kamsnaps.com and I did not use the D rings to attached the swivel
hoops. I just attached
the swivel hooks directly to the fabric loops on the top of the bag. A picture of my first bag made with the
decorator fabric is shown below:


After finishing the first
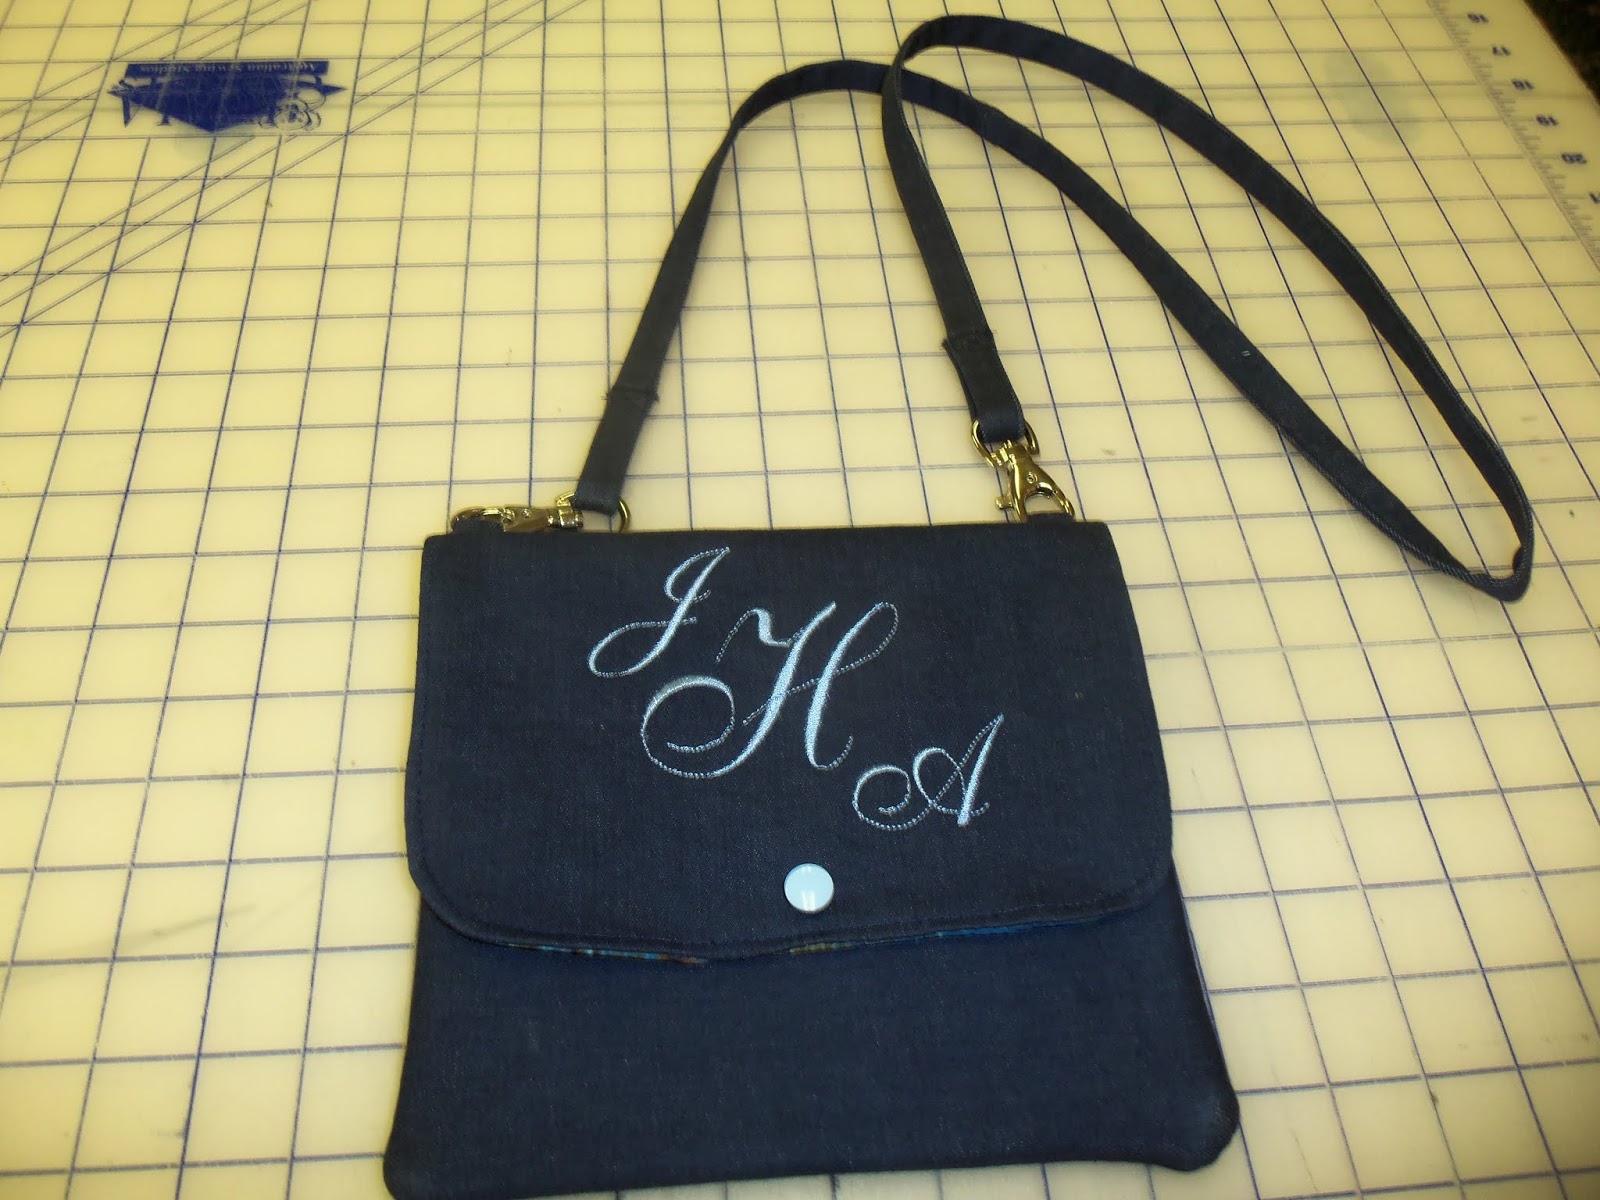
bag, I knew what changes I wanted to make to the next bag. The first change I made was the size. It needed to be approximately 1½“ wider for a
larger phone to fit. That was an easy
change. I also wanted to use denim
fabric for the bag. I wasn’t sure if
bias tape made from denim would work to finish the outside edges of the
bag. I thought it might make the edges
of the bag too thick to sew through. I
decided I would sew the bag right sides together and leave an opening to turn
the bag. I wasn’t sure this would work either,
but I was willing to try. It worked, but it required a lot of steam
pressing after the bag was turned. I liked
the snap I used on the first purse, so I used the same for the denim bag. I made small individual pockets for my
credit cards and identification (drivers license). I embroidered
my initials on the flap that covers the inside of the purse. Instead of the square corners on the flap of
the first bag, I rounded the corners on the flap of denim bag. Pictures of the denim bag are shown below.


If you are interested in making one of these bags, please let me know. I am thinking of posting the instructions on my website. You can contact me at chickenlittlesews@gmail.com.
I hope you are having fun with your summer sewing projects!
Judy
This comment has been removed by a blog administrator.
ReplyDelete