Sunday, December 27, 2020


Fitting a Pattern for a Bodice or Top

Fitting Topic No. 1 - Choose a Pattern and a Size

I believe the biggest determent to sewing clothes for most women is getting a pattern to fit.  If we could be sure that after putting our money, time and energy into making a garment, it would fit when finished; most of us would be happy to sew!  However, many times after we finish a garment, we are disappointed because it does not fit well.  I would like to offer a few tips and techniques I have learned through many years of fitting by trial and error.  There are a lot of fitting methods and I have tried most of them in search of garments that fit me.  Fitting cannot be covered in any one session.  So, my plan is to give tips and techniques for fitting during my next few posts.  Fitting is a process that requires practice.  Don’t just take a quick glance at the back of the pattern envelope and start cutting your fabric.  Be prepared to spend some time researching fitting and trying techniques to learn which ones work for you.  Your goal is to create a well-fitting garment and careful preparation will ensure that goal will be met! 

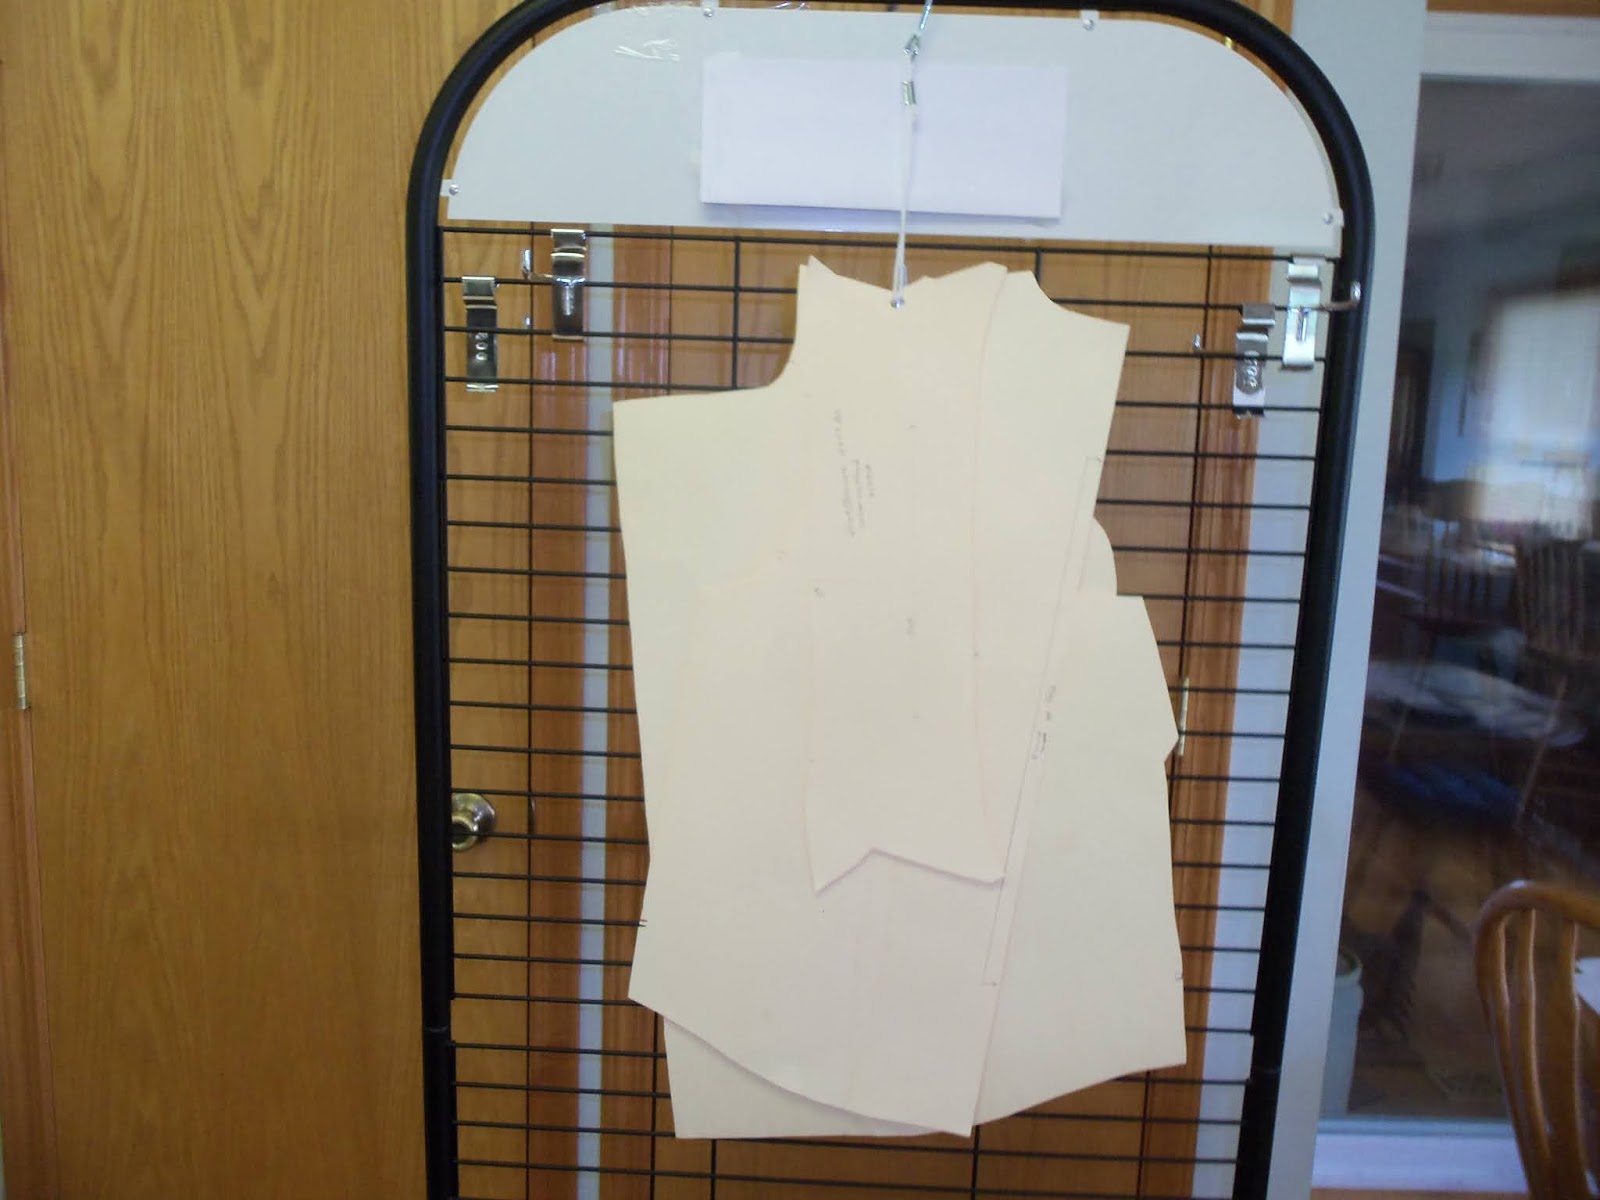
Start with fitting a pattern that can be used to make a bodice or top.   I chose Simplicity 8061 because it is a simple pullover top with a jewel neckline, side seam bust darts and short sleeves.  The back has a single button and loop closure.  The pattern recommended fabrics are cotton, cotton blends, challis, silk, linen, and linen blends.  I recommend using a cotton or cotton blend fabric to make a mockup for fitting purposes.  You can use muslin for the mockup, but I am going to use some cotton fabric in my stash that I know I will never use to make a garment I intend to wear.  I know the fabric I am going to use is not a good quality cotton, but it will work for a mockup.  I will throw away the mockup after I create a pattern to fit me.


First, you will need to take a few body measurements:

Bust – Measure your bust over the fullest part.  Be sure to keep the tape measure level across your back.  Put one finger under the tape and read the measurement.

High Bust – This measurement is taken above the bust, under the arms and across the back.

Waist -  Measure around your waist comfortably – not too tight and not too loose.

Bicep -  Measure around your bicep.  Don’t pull the tape too tight.

Hip – Measure around the widest portion of you hips. 

Now that you know your measurements, you can pick a size to begin your project.  The back of the pattern envelope will not show a “high bust” measurement.  It will give only the “bust” size, the waist size, and maybe the hip size.  In order for the top to fit you well, it must fit at the shoulders.  The top hangs on the body from the shoulders, so it is imperative that you have a good fit at the beginning of the garment – the shoulders.  Most patternmakers increase the width of the shoulders as they increase the size of the bust.  However, that is not the way real life works.  You can have a full bust without having exceptionally wide shoulders.  Therefore, take your “high bust” measurement and find the closest “bust measurement” on the pattern envelope.  That is the size you will use.  You will get a better fit at the shoulders and you can increase the bust before you cut your fashion fabric.  For example, if your high bust measures 36 inches and your bust measures 40 inches, you should pick size 14 on the example shown below. 


Obviously, in order to get a garment on and off and be able to move comfortably, a garment must be larger that your measurements.  That extra room is called “ease”.  Ease is the  difference between your measurements and the garment measurements.  Most patterns will show the ease on the individual pieces.  For example, the pattern I used showed the total ease for the top on the front pattern piece.  If you add the ease to the bust measurement on the pattern envelope, it should equal the total measurement around the completed garment at the bust.  To make sure I will have enough room in the garment, I like to measure across both the front and back pieces of the garment at the bust from seamline to seamline.  Then I can compare that figure to my actual bust measurement and decide if it has enough ease to allow me to be comfortable.  To make it easier for me to take this measurement, I draw the seamline on the pattern pieces. 

A pattern for a blouse or top may not give hip measurements on the back of the envelope and may not give the ease over the hips on the pattern pieces.  You need to make sure the pattern fits over your hips with some extra room for ease.  So, measure across the pattern pieces at the hips from seamline to seamline as you did for the bust.  Compare the total to your hip measurement.  Now you know if you need to add anything at the hips before you cut your fabric.

One of the reasons a pattern may not fit you without alterations is most patterns are drafted for women who wear “B” cup bra sizes.  If you are not a B cup size, you will probably need to alter the bust on your pattern.  I will address that issue in one of my coming posts.  If you want to follow along with me and create a pattern for a top that fits you, prepare by getting a pattern for a simple top with side seam bust darts.  Take your measurements that I listed above and watch for my fitting posts on this blog. 

If you have any books or videos about fitting, you could do some research on fitting before you begin.  There are two excellent books on fitting that I use.  They are Fit for Real People  by Pati Palmer and Marta Alto and The Complete Photo Guide to Perfect Fitting by Sarah Veblen.  I don’t sit and read a fitting book from front to back.  Instead, I search it for answers to my personal fitting problems.  Then I do a sample to see if I understand the procedure and if it will work for me. 

Next time, we will begin to prepare our patterns for cutting a mockup.  I will also discuss making a full bust adjustment.

Have fun with your sewing projects!

Judy


Sunday, November 22, 2020

 Focus Beyond 2020

I know 2020 has been a strange, unusual and not so productive year for most of us.  I personally experienced a lot of ups and downs.   I tried to stay optimistic most of the time, but I did get discouraged at times.  I had some health issues and those close to me had some as well.  My daughter experienced a very serious health issue with Covid-19 and is still trying to recover.  She is much better and for that we are truly grateful!  Now that a vaccine is on the horizon, I am going to try to move forward and concentrate on getting back to normal sometime in the next few months.  I am going to focus on sewing to divert my attention from the fact that we must stay at home to try to avoid getting the corona virus.

Fortunately, I am a member of the Lansing Chapter of the American Sewing Guild (the guild).  This organization is focusing on providing information and service to our members even in this pandemic.  The guild recently began to hold its monthly meetings via Zoom.  It also holds some of its Neighborhood Group meetings the same way.  Although this is not an ideal way to have meetings, it does provide our members an opportunity to exchange ideas and to plan and prepare for the future.  This will have to suffice until this virus is controlled and we can again hold live meetings!

At the last meeting of the Chapter Advisory Board for the guild, I volunteered to give the presentation for the March meeting on how to fit a bodice pattern.  Now I really need to focus on preparing to give that presentation.  I have plenty of time, but I also need to research all my options for giving the presentation via Zoom.  Not only will I be preparing instructions for fitting a bodice, I will also be exploring the options available on Zoom.

 In the meantime, I needed a sewing project I could do now.  Just as I was contemplating what that would be, I was emailed the latest edition of the Lansing Clippers, the newsletter for the guild.  The Serger Neighborhood Group that is a part of the guild has been working on small projects with directions from the group leader, Carrie K.   In the Lansing Clippers Carrie provided instructions for making a flannel quilt-as-you-go baby quilt.  It could be sewn on either a serger or a sewing machine.  I decided to put mine together using a serger and then I added stippling stitches to it with my sewing machine.  Pictures of the quilt in progress are shown below.


The guild is currently sewing items to donate to the Infant to Toddler Program at the Pilgrim Congregational Church in Lansing.
  This organization provides clothing and other items for children in need.  We provided 202 items for them in 2020 and we will continue to donate items to them in 2021 as part of our Community Service Program.  This is where the quilt I just finished will go. 

Now I am going to plan my next sewing project.  I am going to concentrate on another great year of sewing and not worry about anything in the past that I cannot control.

 I hope you have plans for some fun sewing projects!

Judy


Saturday, October 24, 2020

 Another Sewing Slump!     

Once again, I have been experiencing a sewing slump.  I just can’t get interested in sewing anything.   I don’t think I am alone.  I think there are lots of us that can’t get interested in sewing or in anything else that used to be really fun.  I believe it is a part of this weird year, 2020.  In January of 2020 I had no idea what the year would bring.  I was looking forward to a month’s long vacation in February on St. Simons Island, Georgia.  That part of 2020 was fun.

We had a great vacation and returned home to Michigan the first week of March.  I was able to join my friends at one of our group sewing sessions and then the Coronavirus reared its ugly head.  That was the end of our group sewing sessions and all other social events.  We were told to stay at home and avoid crowds.  At first, I did okay with the new plan for life.  I stayed at home and focused on sewing.  I made masks for our family and others.  Then I posted small, quick to finish projects on ChickenLittleSews.com to try to encourage others to return to sewing.  Then I made a t-shirt and several bags.  And then I reached a point where I could not sew.  I don’t know if I am bored or just tired of the situation this Coronavirus has forced us into.  Will life every be “normal” again?

I realized I had to do something.  I couldn’t just sit here and let my life go by.  I looked in my mirror each day and saw more and more wrinkles on my face.  Each day brought a few more aches and pains.  It was even getting difficult to walk.  I would probably have gotten more grey hairs, but that process had taken place years ago!  

Finally, I realized there was actually two somethings I needed to do.  Number one, I had to take care of my health.  I knew the first action I had to take was to begin to exercise again.  I have started doing a walking CD.  It has a one, two, and three-mile walk.  I started with the one-mile walk and the goal was to do it at least once a day.  Some days I accomplish that goal and some days I don’t.  I am still working on the goal.  At least I haven’t given up. 

The second something I needed to do was something fun.  I think this is important for all of us especially now when everyday life is so out of whack!  I decided I needed to sew something.  It wasn’t easy, but I forced myself to start with something simple.  I cut out and sewed a plain t-shirt.  That sounds easy, but for someone bored or tired, it really wasn’t.  It took more than two weeks.  I did some tweaking to the fit of my pattern, but now it is finished.  


I think I am back to sewing and hopefully, my sewing slump is over.  I started a shirt for my husband about a month ago, but then the slump started and I couldn't finish the shirt.  That shirt will be my next project.  

In the middle of making the t-shirt, my daughter was diagnosed with the Coronavirus.  She is now in ICU with Covid-19 double pneumonia.  We are praying for her healing.  Although she is still in ICU, she is making progress.  

I think I will remember 2020 as the year of sadness.  All of us have been affected by this year of sadness in one way or another.  Even though this has been a sad year, I believe most of us have things to be thankful for.  I know I do.  I may look a lot older, but at least I am still here.  I will take life a day at a time and try to enjoy it!  I hope each of you will try to find something healthy and fun to do to occupy your time during this difficult year.  Maybe 2021 will be the year of return to happiness and contentment.

I hope all of you are staying safe and healthy.

Judy

Thursday, August 27, 2020

New Clothes Don't Really Matter

Prior to summer, I realized I needed some new summer clothes.  I intended to make some new tops and capris, but then the pandemic hit and I had masks to make.  And then my husband and I had lots of medical appointments.  In between appointments, I was finishing up other sewing projects and sewing some items for a baby pantry in Lansing.  I also made more masks. 

The only item I sewed to add to my summer wardrobe was one t-shirt.  I found a piece of green knit in my stash left over from a top I made last year.  I also had a small piece of white knit.  I decided to put the two pieces together to make a t-shirt with a yoke.  I tweaked my pattern a little and now I really like the fit.  I have other pieces of knit in my stash that I could use to make some color blocked tops.  However, the trick to that is to find knit pieces that are similar in weight and that blend well together.  I should cut small pieces of my fabrics and carry them with me to shop for other knits that would work well with what I have.  Then I could do more color blocked tops.  That could be a project to do after the snow starts to fly around here.

A picture of my new top is shown below.  We are still doing social distancing, so I have had very few opportunities to wear my top except to medical appointments.  Not having new clothes really doesn’t matter if you are staying home most of the time.

This pandemic has affected each of us in many different ways.  It has affected the products we are able to buy.  Many common items have become scarce and hard to find in our stores.  Many of us are hoarding these common items if we are able to find them.  We will buy and store as many as we can find.  Toilet paper, Dawn dish detergent, and Wet Swiffers are just a few that come to mind.  It has affected where we go and what we do.  We can no longer gather with our friends to socialize and/or worship together as we used to do.  When we do gather in very small groups, it is necessary to wear masks and maintain a distance of at least six feet apart.  We can no longer send our children to school without fear of spreading Covid-19. 

And in the midst of all this, we are subjected to all things surrounding a national election.  We have become a nation of angry people; people who shout at each other; people who do not respect others’ view on anything.  We expect others to listen to us as we shout out our views on social media, but we tell them to please not respond if they disagree with our view.  Each time I read that remark on Face Book, I think, “Really!  Why do you think we must listen to your viewpoint, but you are not willing to listen to ours?”

It is no wonder I can’t think of anything I really want to sew.  I think I have lost my creativity.  This pandemic has striped me of my desire to sew, my desire to create something new, my desire to learn something new, and my desire to be a better me!  No, it is not just the pandemic.  It is a combination of the pandemic and the political nonsense we are all pelted with.  I sometimes just feel beaten down.

I look forward to the day we all get back to “normal” again.  I hope I live long enough to see that day.  I am now within spitting distance of 80 years of age.  I understand that is the mark when we should get our affairs in order and share our financial information with our children.  Instead or maybe in addition to those things, I would like to share with our family and friends some sort of normal gatherings without fear of losing another friend or a family member.  I would like to sit and sew and visit with my friends again and share ideas and new projects.  I would like to worship with our friends in church and visit with them afterwards and enjoy a meal together.  Those are the things I look forward to doing once again and new clothes really don’t matter.  I would enjoy doing those things even wearing clothes I made years ago!

Happy sewing to you!  Please don’t let this pandemic and/or these political times get you down.  Just move ahead with your projects and try to treat others with respect and kindness.

Judy


Wednesday, July 22, 2020


Finally!  A Real Fabric Shopping Trip!

For the last 4 or more months, my husband and I have stayed at home most of the time.  Of course, we have made the usual trips to medical appointments that people of our age make and have picked up groceries after ordering them online.  All of this has been done to try to stay safe during the Covid-19 pandemic.  Today we decide to take a drive to break the monotony.  I suggested we drive to Richland, home of Fabrications.  I knew Fabrications had a 25% Off Sale starting today through August 22.  We wanted to enjoy our drive, so we avoided the expressway.  We took Divine Highway to M66 to Lacy Road west to Cobb Road and then M89 to Gull Road.  It was a beautiful drive with very little traffic. 

Late last year, Fabrications moved the fabric store from 32nd Street to 8709 Gull Road, Suite B.  They moved the yarn to 8719 Gull Rd.  I had not been able to visit their new locations until today.  I made a quick stop at “The Yarn Cottage”, where the yarn is sold and said hello to Dick.  Then I went around the corner to Fabrications’ “Fabric Warehouse”.  It is located directly in back of the State Farm office.  It is small, but is filled with lots of wonderful fabrics and sewing supplies, including thread, buttons, books, and notions.  Janet uses all her floor space very efficiently.  She even has a separate area for teaching classes. 

Janet was teaching a one-on-one class when we arrived.  We were greeted by her daughter who made my husband and I both feel welcome.  We were the only ones in the store except for Janet, her daughter, and one student in another room.  Dave returned to the car to read while I browsed the shop.  It felt so good to be able to touch all the fashion fabrics and envision what I could make from them.  That is why I don’t like to buy fabric online.  I need to touch it to know whether I like it or not.  I know I should be able to determine that by the name of the fabric, but I am not there yet.  I still need to touch it! 

After Janet’s class was over, she helped me find some fabric to make some fall/winter slacks.  I also purchased shirting to make two shirts for Dave and one for me.   When I noticed the Palmer Pletsch book, Complete Guide to Fitting, I knew I had to have it.  Even though I already have several books on fitting, I seem to have an obsession with buying more.  I think I am looking for something that will magically make patterns fit me.  I know getting a good fit is possible, but it requires hard work to get it done regardless of the method you use.  I am just making sure I have the resources on hand to try whatever method I choose at the moment.


When I finished shopping, Dave was patiently waiting in the car me.  We chose a different path to go home, but it was still back roads with no expressways.  We had another beautiful drive!

If you are bored with staying home, you might choose to go for a drive and include a trip to Fabrications.  It is well worth the drive.  And if you go before August 22, you will get 25% off almost anything you purchase.  If you knit, remember to stop and see Dick at the Yarn Cottage.  Merchandise in the Yarn Cottage is included in the 25% off sale.  Masks are required.

Have fun and stay safe.

Judy

Monday, July 20, 2020


How to Keep Your Favorite Patterns in Good Shape

Do you get tired of trying to refold your patterns and get them to fit back into a pattern envelope?  I do.  Also, after I make several articles from the pattern, the pieces become wrinkled, tattered, and distorted.  To avoid these things, I take my favorite patterns (those I know fit me) and transfer them to tag board.

I do not like to waste a pattern, so I always transfer it to medical paper before using it the first time.  Medical paper is the paper your doctor uses on the examining table.  I usually need to alter any pattern I make, so this paper is a good choice because it is inexpensive and is easy to see through for tracing.  Once I have the pattern made, I will cut the fabric and make a trial garment.  After I get it to fit the way I want, then I transfer the pattern to tag board.  I cut all the pieces out, label them, attach them to a pattern hook and place them in a spare closet or on a clothes rack.  No folding needed.  They are ready for me the next time I want to make that garment. 


The following is a list of supplies you need to transfer your pattern to tag board:

tag board
notcher
awl
tracing wheel with sharp spikes
hole punch
pattern hanger 

Tag board is sometimes called oak tag.  It is similar to the paper used to make manila file folders.  I purchased my tag board from Amazon.com in a large roll that is 58 inches wide, but I do not recommend you do that unless you don’t mind paying a large freight bill and getting a life time supply.    Amazon and other companies sell large sheets of tag board in varying quantities and if you have Prime membership, it may ship for free.  Even Walmart.com sells sheets of tag board.  Just make sure the sheets are large enough to trace the individual pieces of your pattern. 

I use a notcher to mark the notches on the pattern.  The notcher is also handy to use to mark the beginning of darts and other things such as pleats of tucks.  I use a tracing wheel with sharp spikes to transfer markings such as darts.  Then I can see the small indentations on the tag board and can mark the dart with a pen or pencil.   I also use an awl to mark things like the bust point.

Most people trace the pattern pieces onto the tag board with no seam allowances.  That way, when you trace the pattern onto your fabric you have the precise sewing lines and then you add the seam allowances before cutting the fabric.  I have not been doing that.  Instead, I trace the pattern with the seam allowance included before I transfer it to the tag board.  The next pattern I trace onto tag board, I intend to do it without the seam allowance and see how I like that method.   You can use a fabric marker or a chalk marker to trace the tag board pattern piece onto the fabric.  I prefer to use the chalk marker. 

After your tag board pattern pieces are cut out, punch a hole in the top of each piece and place all of them onto a pattern hook.  The pattern hooks can be purchased at Amazon or other online companies.  Now your favorite pattern is ready for the next garment without trying to unfold and press it to get it ready to be used.


There are lots of different kinds of paper or other material that can be used to trace patterns.  I am just sharing with you the method I like for keeping my favorite patterns.  If I don’t plan to make more than a couple of garments from a pattern, I don’t transfer it to tag board.

Good luck with all your sewing projects!

Judy


Tuesday, June 2, 2020


Serger Purse

After completing my project for the charity sew for the Lansing Chapter of the American Sewing Guild, I still could not think of anything I wanted to sew for myself.  I decided to focus on learning something new, but I didn’t know what that something was.  I tried to think of some sewing technique I could learn and then incorporate it into a garment.  Still, no ideas.  I had all this time on my hands and could not think of anything to sew!  Finally, while I was entertaining myself by scrolling through Facebook, I noticed Country Stitches had featured some serger purse patterns from Deb Canham Studio.  I might be able to get interested in making a purse with my serger.  That would give me the opportunity to learn to use my serger for something other than just finishing the seams on garments.  I wondered if one of the purses had a zipper enclosure.  I don’t like a purse with a magnetic closure.  I much prefer the security of a zipper.  I called Country Stitches and Nicole told me the pattern required a zipper.  The pattern was “Flat Lock Purse on the Serger” by Deb Canham Studio.  I was familiar with the flatlock stitch, so I figured I would not have any problems.


I purchased my serger, a Baby Lock Ovation, about four years ago.  I took the classes to learn to use it, but of course I never practiced what I learned.  I started making a different serger purse a couple of years ago with a sewing group, but we never finished it.  It seemed complicated and overwhelming at the time.  This pattern looked a lot simpler.  Besides, I had plenty of time to figure it out because the “Stay at Home” order would be in effect until June 12th. 

Everything went well for a while.  I cut the purse out and got the outside pieced together using the 2 thread flatlock wide stitch.  I even inserted ribbon and added trim.  No problem.  Then I had to set the serger up for the chain stitch.  Of course, I did not remember how to do that!  I read the instructions in my manual and everything went well until I tried to lower the knife.  The knife would not stay down and it is impossible to do a chain stitch with the knife up.  So, I took the serger to Country Stitches to be repaired. 

After I got the serger back, I resumed my self-training.  I got the chain stitch figured out and quilted each section of the purse.   Then I moved to the wave stitch.  The instructions in the manual were clear, so I understood how to set the machine up to do the wave stitch.   However, there was a problem.  I needed to use decorative thread in both the upper and lower loopers.  I was able to get the decorative thread through the upper looper, but it would not thread through the lower looper.   I noticed the problem of threading the loopers with heavier decorative thread was discussed in the Techniques Section of the manual.   I thought I would just use regular thread because I did not want to take the time to learn to do that.  I tried using the regular serger thread on a sample of a wave stitch and it was not pretty; in fact, it was ugly.  I remembered I had nothing but time on my hands and the purpose of this project was to learn to use my serger.  I picked up the manual and read the instructions.  They were quite easy to follow. 

The zipper on the purse was installed using the cording foot and flatlock wave stitch.  I didn’t even know I had that stitch, but it was easy to do by following the instructions in the pattern.  It is amazing what you can learn by actually reading directions.

I made the handle using my sewing machine.  The pattern called for making the strap using the triple cover stitch and a belt binder, but I did not have one.  Now that I think about it, I wonder if a belt binder might be one of those many extra feet I have for the serger.  I will have to check that out and experiment with it if I have it. 

This was a great learning experience for me.  I learned a lot about my serger and a little about myself.  I learned my serger will not bite, so it is okay to try stitches when I am not sure how to do them.  It is also prudent to read the manual and not be “chicken” to try something new.  Pictures of my purse are shown below.  The pattern is actually a disk that you use to print out the instructions for the purse. 


I hope you are having fun sewing.  Keep learning!

Judy


Tuesday, May 19, 2020


Fabric Shopping Trip

A few days ago, I couldn’t think of anything I wanted to sew.  Some of my sewing friends were making t-shirts, so I browsed the internet trying to find a good source of knit fabrics to use for t-shirts even though I knew I had a stash of knits on hand.  I soon realized that even if I found fabric to order, it would be days if not weeks before I received it.  So, I moved to another project.  I decided maybe it was time to sew for charity.  The Lansing Chapter of the American Sewing Guild is sewing this year for a baby pantry in Lansing.  In ordinary times all of us would be making clothes for children to donate to this charity.  We would even schedule a day to sew together to make clothes for the pantry.  But these are not ordinary times and I haven’t heard much about this project.  I decided it was time for me to get started.

I found a pattern in my stash that I think will be perfect for a small child.  It is one I purchased when my granddaughter was young and I never got around to make it for her.  She just turned 21.  The pattern is Simplicity 8948.  This pattern meets my needs because it is cute and quick to cut out and assemble.  The pinafore top is lined so there are no facings to cut out and sew.  It does have two buttonholes and two buttons.  That should be easy enough.  The panties have an elastic waist and elastic encased in the leg openings.  Only two pattern pieces are needed.  After sewing one of this outfit, I should be able to cut out several and sew them together as in a production line.

In order to proceed, I needed fabric for the first outfit and more fabric for the “production line”.  I found one piece of fabric in my sewing room I could use for the pinafore, but I needed another piece for the lining and the panties.   I realized I needed to shop for fabric that did not require waiting for shipment or pickup.  The only place I knew where I could get fabric instantly during this pandemic was right here at home.  If I didn’t have the right fabric in my sewing room, I probably had something I could use at my “other location”.  I decided to take a fabric shopping trip all the way down to my basement!  And wouldn’t you know, I found some fabrics I could use.  I traveled back to my sewing room and cut out the first pinafore and panties in a size 2 toddler. 

A picture of the completed project is shown below along with a picture of the pattern envelope,


I hope you are having fun with your sewing projects.  If you run out of fabric or other sewing supplies, remember that most fabric shops are doing curbside pickup.  That includes Country Stitches in East Lansing.

Judy

Sunday, May 10, 2020


Completion of Audrey Purse

No more artificial deadlines for me.  I set one for myself when the Covid-19 “Stay at Home” order took effect in Michigan almost nine weeks ago.  I decided if I was going to be home most of the time I could post on my blog once a week on Saturday.  You will notice I did not post yesterday.  I decided I will now post when I have a project ready or an Item I want to discuss.  That may be weekly, once every two weeks, or even once a month.  The deadline I gave myself of posting weekly was causing me to focus almost entirely on sewing.  Although I love to sew and I love to talk and write about sewing, there are other things in life that require my attention as well. 

This past week I was able to complete the Audrey purse that I started some time ago.  I stopped work on it when I thought I did not have all the hardware I needed.  As I explained to you in my last post, I telephoned Sew Unique Threads in Battle Creek on Saturday and by Monday I had the hardware.  I really appreciated the great service Sew Unique Threads provided.  This week I picked up the bag and began where I left off.  I was at the point of sewing the front and back pieces together.  I had previously quilted the pieces to the foam interfacing, so the pieces were pinned with the right sides together.  I got the two gun-metal 3-D rings from Sew Unique Threads and started to read the pattern to see how to install them.  Was I surprised!  They were already sewn – one to the right side of the front and one to the right side of the back.  That is why I couldn’t find them.  The purse was pinned together with the wrong sides out and I didn’t remember sewing them on.  Now do you understand why I am no longer giving myself a deadline of posting once a week?  I apparently was driving myself nuts trying to meet my own self-imposed deadline.

The pattern I used is Audrey by Sallie Tomato.  This purse was much easier to make than the large bag I posted last week.  It is a crossover purse with a zippered pocket on the front.  The zipper is covered with a flap so it doesn’t show.  The pattern shows optional metal handles.  The strap can be removed and the purse can be carried by the handles.  I have the metal handles, but chose not to use them on my purse.  I am thinking of making a purse for a gift and I may use the handles on that one.  I also think there may be an easier way to install the zipper at the top of the bag.  I may try to come up with that for my next “Audrey” purse.

I made two changes to the pattern.  The purse has an adjustable strap.  Even so, I still shortened the strap by 32 3/4".  It was just too long for me.  I also shortened the height of the purse.  The finished height of the pattern was 11 inches.  The finished height of my purse is about 8". 

Pictures of the purse are shown below.


I hope you are having fun sewing!

Judy


Sunday, May 3, 2020


Another Week Down

Well, here we are in the middle of the eighth week of the Covid-19 Stay at Home period for those of us in Michigan.  I am still not bored.  I have more than enough things to do to stay busy.  However, certain things are beginning to wear on me.  I am tired of constantly thinking about my health and that of my husband, family, and friends.  I am tired of making sure we have hand sanitizer and masks in the car before going to pickup groceries or prescriptions.  I am tired of ordering groceries on-line and then not being able to get what I ordered.  I know that will only get worse in the coming weeks.  I am growing weary of not being able to worship in church with our church family.  On the other hand, I am thankful that by doing these things we may be able to get to the other side of this pandemic safely.   So, I will keep my eyes on the prize; that being, getting through the spread of the Covid-19 safely and returning to most of the activities I enjoy with my friends and family.  I especially miss being able to sew with my friends! 

Dave’s raspberry plants have left my sewing room.  They now reside in one of our four gardens.  They looked great when Dave first transplanted them, but not so good now.  The cold, wet weather has affected them. 

The ground cherries are still with me.  They are slowing beginning to raise their heads above the potting soil.  I would show you a picture, but they are so miniscule that I don’t think you could see them. 

This past week I worked on making the bag I started last week when I discovered I didn’t have the hardware to complete the Audrey purse by Sallie Tomato.  I called the shop where I purchased the Sallie Tomato pattern and ordered the hardware I needed.  I ordered it Saturday and it was here Monday.  Thank you, Sew Unique Threads in Battle Creek, for the excellent service you provided! 

When I had to postpone work on the Audrey purse, I focused on making a purse with McCall’s pattern M6532.  Although I did not have the exact fabrics and interfacings on hand suggested by the pattern, I had some I thought would work.  While the pattern called for cotton or cotton blends, I used a red, navy, and light beige colored fabric that was close to a denim weight.  The pattern called for two interfacings:  single-sided fusible Pellon Peltex 71 and a light to medium weight fusible fleece.   I used Bosal In-R-Form Plus Unique Double-Sided Fusible Foam Stabilizer and 100% cotton batting which was not fusible. 

Throughout the process, I struggled with the thickness of the layers of fabric I was sewing.  I realize the cause of this might be that I was not using the exact materials required by the pattern.  At one point while I was stitching the thickest part of the bag, my machine, a Pfaff Creative Icon, put a message on the screen that read: “Your machine cannot sew through all layers of your fabric.  Please remove some layers before continuing.”  Obviously, that was impossible.  I was sewing the top of the bag to the main portion of the bag where the pull tabs were located.  I think I counted about 9 layers of various depths including the fabric, the Bosal In-R-Foam and the batting.  At that point I wondered if a mechanical machine might work better.  I set up my Pfaff Passport 2.0.  It sewed right through all layers with no problem.  This just proves you don’t have to buy the most expensive sewing machine to able to sew most items.  I hope I can remember this if I get tempted again.  I may be tempted to buy a good mechanical machine to use just to make bags and winter coats.  I like my Pfaff Passport, but it is a small machine with a narrow sewing bed. 

Another problem I created for myself was with the two interfacings.  Both interfacings required by the pattern were fusible on one side only.  I used Bosal that was fusible on both sides.  This created quite the problem when I tried to iron it on or press a piece after it was fused.  The batting I substituted for the fusible fleece was not fusible on either side, so that created a different problem.  I fused the batting to the fabric by using Mistyfuse.   I managed to make the interfacings work, but both substitutions were time consuming.

I finished the bag this morning.  I think the one thing I learned making it was I don’t want to make another one anytime soon!  I know I said I might see if I could reduce the size of the bag and make a smaller purse; however, that is not in any immediate plans of mine.

A pictures of the bag and pattern envelope are shown below.  The bag measures 18” x 12 1/2” x 6”.


 Keep sewing and stay healthy and safe.

Judy

Saturday, April 25, 2020


Not So Productive Sewing Week

Before I tell you about my week, let me give you an update on Dave’s raspberry plants that I told you about last week.  They are doing great in my sewing room.   They are growing and getting new leaves.  There were four that looked like just bare sticks when they entered my room.  Now even those have new growth.   A picture is provided below.


His ground cherries seem to be doing nothing.  They are all still underground.  None have poked their heads out yet.  When and if they do, I will give you an update.   Also, the onions I planted for Dave are not looking well.  He said we may have to replant them because the cold weather has not treated them kindly.  I am not sure I am up to a replanting.  I am a sewist, not a farmer!

This was a not so productive sewing week for me.  I tried.  I really did, but sometimes even the best laid plans don’t work.  My plan was to complete the purse I was making and feature it in my post this week.  However, I had other commitments that needed to be met first.  I started my week with those.  I made more masks for some friends in Indiana.  Then I sewed a few scrub caps that I promised to do.  After those were completed, I began work on my purse.    I was using the Sallie Tomato purse pattern, “Audrey”.  I purchased it last year on the way to Lansing Clippers Sewing Retreat in Shipshewana with Stoney B.  We usually stop at Sew Unique Threads in Battle Creek on the way. 

I was at the point of putting on the D-rings and attaching the strap connectors.  That was when I discovered I did not have the appropriate D-rings.  I need ¾” gunmetal D-rings and I had none.  Those needed to be attached before I could proceed.  That meant the purse would not be finished in time for my post this week.  Today I called Sew Unique Threads and requested  a hardware kit for the Audrey purse.  The owner of the shop will mail it to me today.  Even though Sew Unique Threads is closed, they will accept phone or online orders for mailing or curbside pickup.  Maybe I can complete the purse before my next post.   A picture of the pattern is shown below.


I searched my pattern stash for a purse I could make in a couple of days.  I found one I liked and cut it out.  It is McCall’s M6532.  I am still searching my stash for fabric for the lining and pockets. Obviously, I did not complete it before writing this post.    I love the look of the bag, but am shocked at its size.  It measures 18” x 12 ½” x 6”.  I know that is too large for me for a regular purse.  I could probably use it as an overnight bag or a sewing bag.  My plan is to make one as a test and then perhaps I can cut the pattern down in size to use as a purse.   A picture of this pattern is shown below.


Another thing that took me away from sewing this week was ordering groceries for pickup.  That can be a time-consuming event, but is very necessary now that we are confined to our homes during the Covod-19 virus outbreak.  It is always a challenge to be able to get a pickup date from one of the stores in St. Johns.  The last time I ordered, I had to go to East Lansing to pick up my groceries.  This time I was fortunate enough to get a pickup date at one of the local stores for next week.  I look at ordering groceries as just one of the challenges we face during these “stay at home” times.  If we can just keep our health, I will be happy and more than willing to stay at home and face a few challenges.

Speaking of challenges, this morning I cut Dave’s hair for the first time.  I have been telling him to let me cut it before it got really long.  That way it would be a “trim” and not a “chop job”.  He didn’t listen to my advice.  A full-blown hair cut or “chop job” was necessary.  He had hair hanging over his ears, down the back of his neck, on his face and sticking out of his ears.  I took a pair of my best scissors and designated them as “barber” scissors.  I did a lot of chopping!  I am not sure he liked his cut, but he did tell me “Thank you”.  His mother taught him that.

I think we completed week number 6 of the “Stay at Home” request and are now in the 7th week.  I noticed more people out this past week when we drove through St. Johns, but most of them were wearing masks and staying 6 feet or more away from each other.  If you run out of supplies for your sewing projects, remember you can email or telephone some businesses like Country Stitches in East Lansing and have an ordered mailed to you or delivered curbside. 

Keep sewing and be safe!

Judy 


Saturday, April 18, 2020


What Are You Doing?

What are you doing with all the time you have while you are advised to stay at home during the spread of the Covid-19 virus?  I have so many choices, I don’t know what to do first!  The last four weeks I was busy sewing and writing posts for my “Small Projects” series on this blog.  Each week I had to decide on a project to do, make it, and write a post.  I filled the time left over from that by making masks, cleaning cabinets, cooking, and doing other essential housekeeping chores.  Oh, yes!  I also helped my husband plant another 308 onions in our garden.  That was probably the most difficult task I did.  It required crawling on my hands and knees down the rows and covering the onions with dirt.  When I tired of that method, I bent over from the waist and leaned down to put the dirt on the onions.   That was just as painful as crawling on my hands and knees! 

This week started with no time constraints.  I could do anything I wanted as long as I had all the necessary items in my house.  I took Monday off from everything.  It was not my choice;  I simply could not move.  Because I hurt all over from planting those onions, I spent most of the day on the couch.  After resting Monday, I moved onto making more masks.  I also searched my stash for fabric for masks and surgical caps.  I came to the conclusion that the longer you keep fabric in your stash, the uglier it gets.  When I looked at some of that fabric, I thought “What was I thinking?” 

I decided my sewing room needed some attention before I could start another project.  It looked like a small tornado went through.  Both cutting tables were filled with leftover supplies and equipment from recently finished projects.  It took quite a while to put everything back where it belonged. 

There were also two t-shirts on my serger table that required some attention.  Both were finished except for hemming the bottom edges and sleeves.  I intended to do that several months ago, but never got around to it.  I think I was simply avoiding changing my serger over to a cover stitch.  It had been so long since I last did it that I had to look at my instruction book to re-learn the process.  Fortunately, I got it threaded and switched over on my first try.  I felt good about that!  Pictures of the t-shirts are shown below.  They may end up as pajama tops.


It became clear to me this week that I should share part of my sewing room with my husband.  He is trying to stay busy; however, the weather is not cooperating.  It has been too cold to plant most of his garden.  He had 20 young raspberry plants that needed a home until the weather gets warmer.  So, we squeezed them into my room next to a large window.  Then he decided to plant some ground cherry seeds in a plastic box and set the box on the end of my cutting table by a window and placed a lamp over it.  That’s okay.  I can share my room.  We are sharing a difficult time with the entire nation.  The least I can do is give my husband some space to pursue his hobby until the weather allows him to do it outdoors.

Next week I will make surgical caps for some nurses in Lansing.  That project is being chaired by Jeanie B., a member of the Lansing Chapter of the American Sewing Guild.  Her daughter is a nurse.   

I would like to work on some online sewing classes if time permits.  I know time will permit if I arrange my activities to include it.  What kind of activities are you doing?  Are you using your time to improve your skills in a particular area of interest?  Are you reading, sewing, cooking new recipes, or relaxing in some other way?  Whatever you choose to occupy your time during this stressful period, please do your best to stay safe and healthy.

Judy