Fitting a Pattern for Capris with an Elastic Waist
I suddenly realized today that spring is not far away. The sun is actually shining and the snow and ice have melted. Maybe I should think about updating my spring and summer wardrobe. I haven’t really needed any new clothes this past year because I wasn’t going anywhere to wear them. Maybe this year will be different! Perhaps we can get together with friends soon if all of us get our Covid-19 vaccinations. Maybe we will be able to go to church, out to eat, and even travel to see family. I sure hope so!
I don’t have any summer pants with elastic waists. So, I decided to fit a pattern for capris using an elastic waist. If I don’t like the look, I can convert the pattern to one with a fly-front. I pulled Simplicity 9674 from my stash. The pattern consists of just two pieces, the front and back of the pants. The waist is cut and folded over to form the casing for the elastic waist. I measured my hips and chose the size based on that measurement. I measured across both pattern pieces from seamline to seamline to make sure there was enough space to equal my hip measurement plus some extra for ease. When you are making pants with an elastic waist, you need to be sure to give yourself enough room to pull the pants up over your hips.

My pattern does not have any pockets. I never make pants without pockets, but this time I am. My goal is to get a pattern to fit me as quickly as possible. I can fine tune it later by adding pockets and maybe even a zipper. But right now, I am only interested in getting the pattern to fit!
I know that pants patterns are always too long for me and I could see by holding the pattern up to my body that this pattern was no exception. The first thing I did to the pattern was to shorten it. Most patterns have a lengthen/shorten line, but this one did not. I drew a horizontal line across the leg about four inches down from the crotch line. I wanted to shorten the pants one inch. I drew a line one-half inch above the original one and another line one-half inch below the original. I folded the bottom line up to the top line and this shortened the pattern one inch. Then I trued the lines on the pattern.
I cut out the first mockup of the pants using some muslin from my stash. Then I transferred all markings from the pattern to the mockup. I sewed the mockup together using a long basting stitch. I tried on the mockup and pulled the pants up to where the crotch should be and tied a piece of elastic to hold them up while I checked the fit. I had to ask my husband for help with fitting the pants. He wasn’t exactly pleased, but he agreed to do it. I made sure the elastic was at my waist and he marked the waist on the mockup with a ball-point pen. The capris looked okay from the front, but in the back, the legs seemed too full and had vertical wrinkles from just under the derriere to the hem. This will happen if you have a flat derriere. I pinched out about one-half inch fabric starting at the derriere and that seemed to solve the problem.
I checked the Pants for Real People book by Pati Palmer and Marta Alto to see how to transfer this alteration from the mockup to the pattern. I learned I needed to take a tuck in my pattern from the waist to the hem, even if by doing so, it made the waist and/or hips too small. This will keep the pants on straight of grain.
I extended the straight- of-grain line to run from the waist to the hem. Then I added another line ¼ inch to the right and one ¼ inch to the left of the grain line. Then I folded the line on the left of the straight-of-grain line to meet the line on the right. That removed ½ inch from the width of the leg from the waist to the hem. After making the tuck in my pattern, I added the same amount at the side seams at the waist and the hips and tapered back to nothing just below the bottom of the derriere. Now, the pants will be the same size in the waist and hip areas as before I made the adjustment, but the legs from the derriere to the hem will be ½ inch narrower. And the pants will still be cut on straight of grain.
I transferred the waist markings from the mockup to my pattern. The waist was noticeably uneven, so I smoothed out the line. The band for the elastic insertion is cut onto the pants pattern. The elastic I tied around the mockup sat on my waistline and I want the bottom of the elastic to touch the waist. Therefore, I measured to make sure I had enough room for the band to rise above the waistline and fold over for the elastic enclosure.
The picture below shows the changes I made to the front of the pattern. As you can see, the only changes I made was to shorten the length and I moved the waist line down a bit.


When I searched my stash for fabric to make the capris, I discovered a pice of linen-like fabric that was green with large black polka dots. I also had a piece of a solid green coordinating fabric, but it was small. I wanted to make the capris and a matching top from the pattern I fit last month, Simplicity 8061. A picture of that pattern envelope is shown below.

After comparing the capris pattern and the blouse pattern to the amount of fabric I had, I decided to make the capris from the polka dot fabric. Then I would have enough polka dot fabric to make a yoke on the front and back of the blouse. The solid coordinating fabric would be used to make the sleeves and the lower portions of the front and back.
To make the yokes, I drew a line on the front and back where I wanted the yoke to end. Then I traced the front and back yokes on a piece of pattern paper and added a 5/8 inch seam allowance to both. Sewing the blouse together went quickly because I just completed one last month using this pattern.
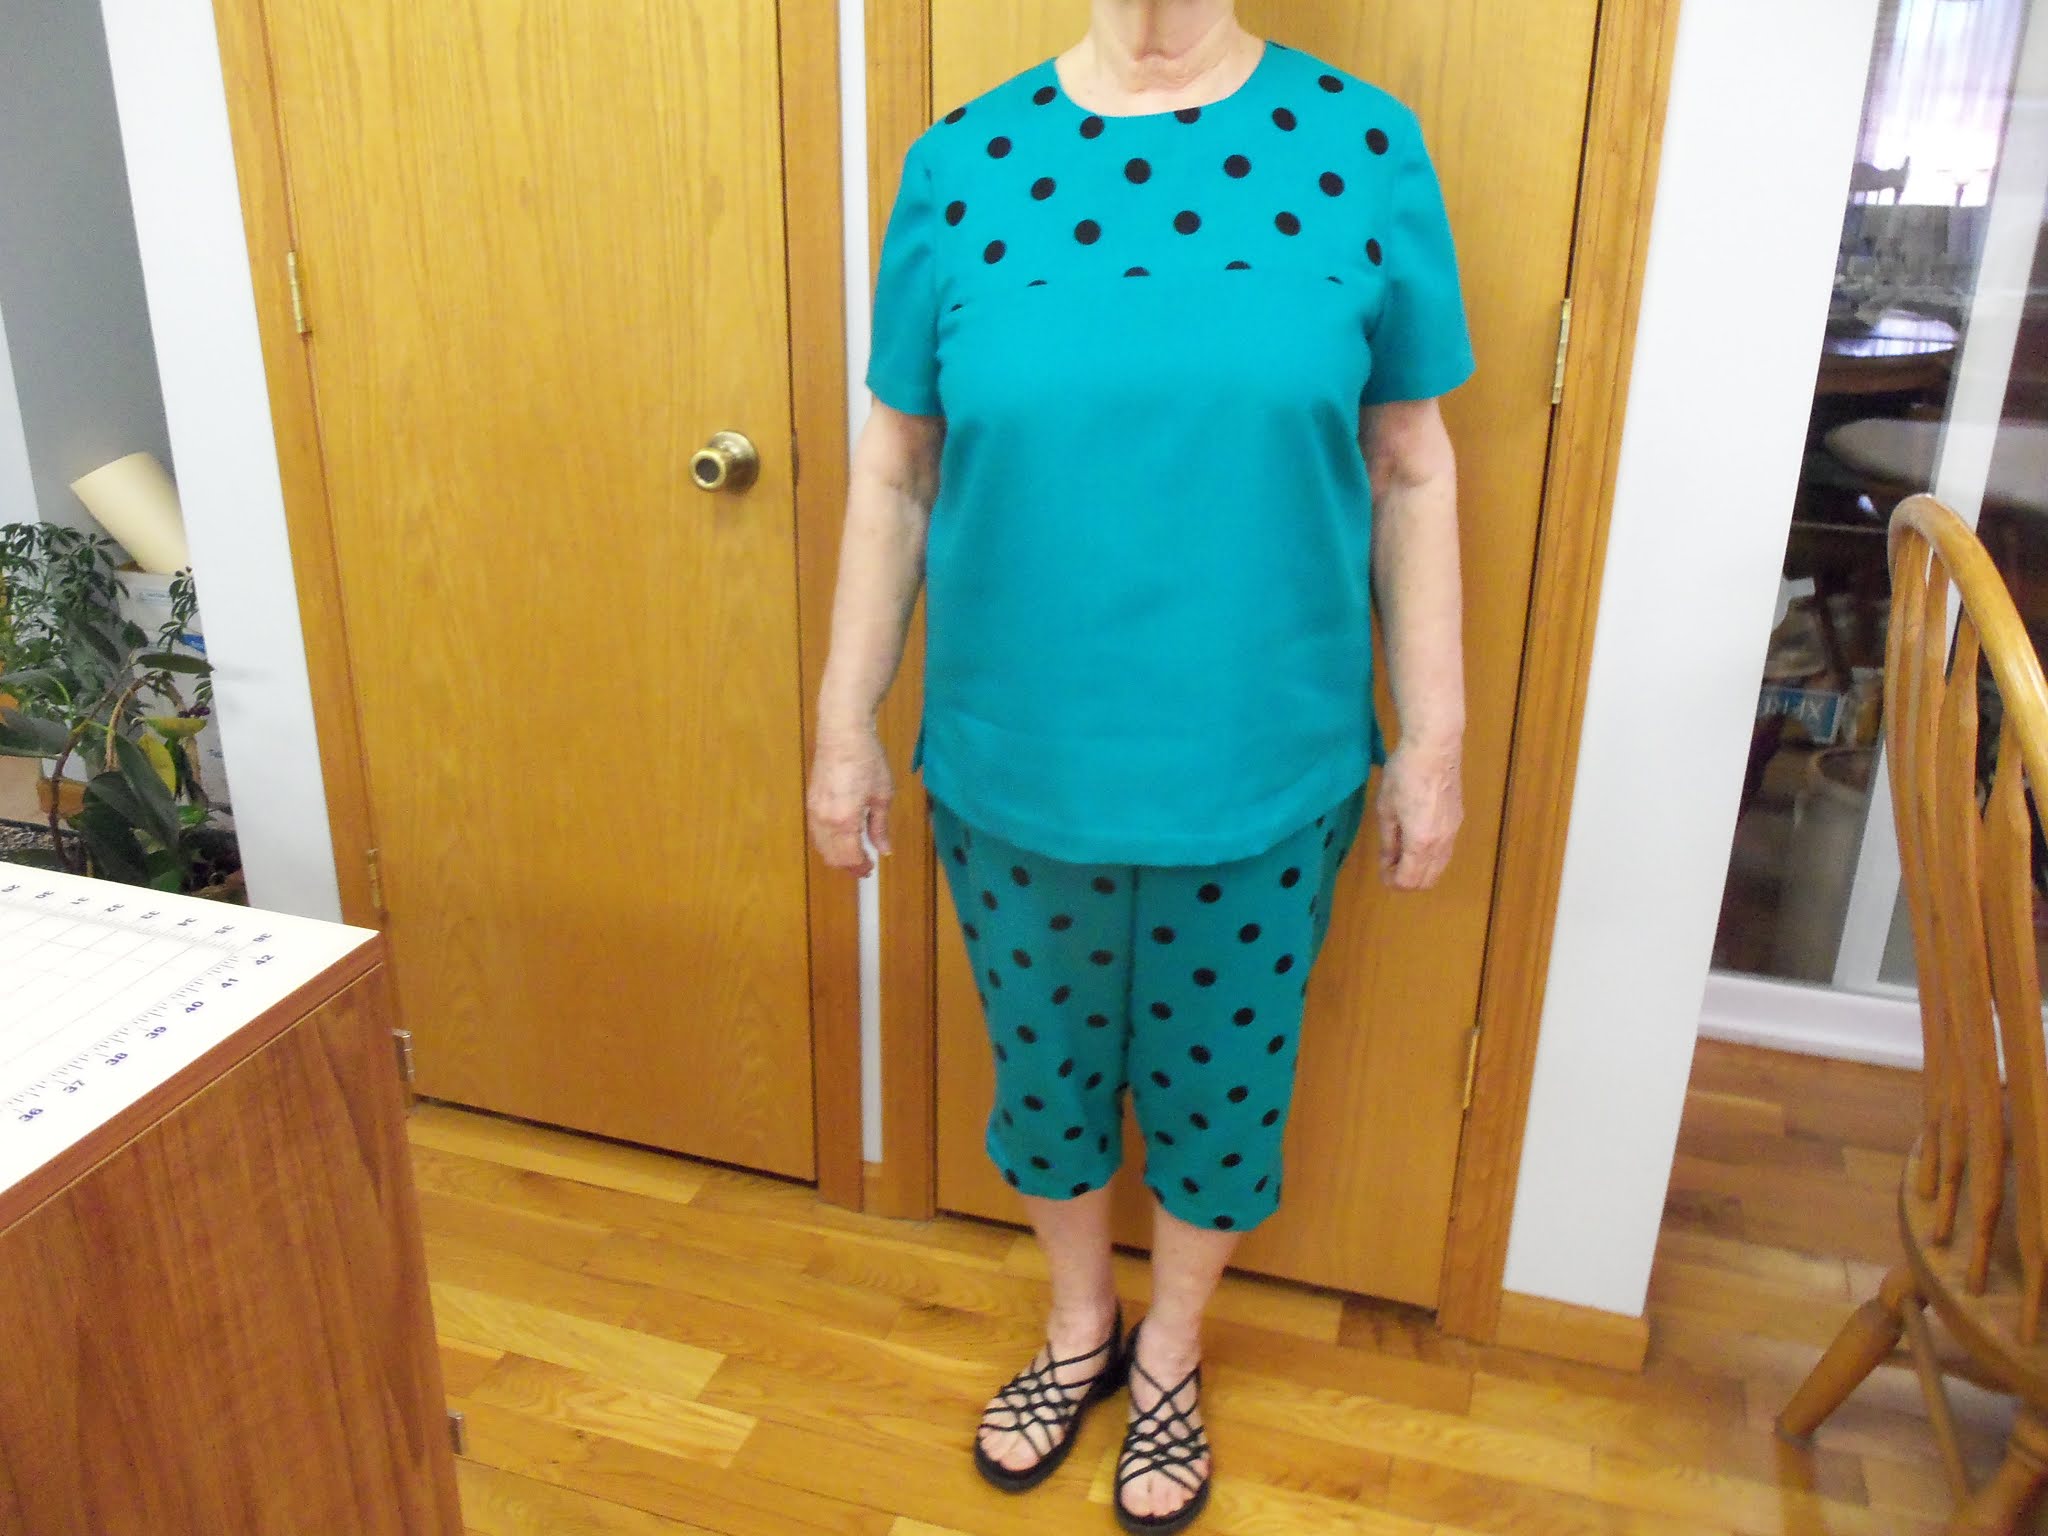
Pictures of the completed capris and blouse are shown below.

Have you started a project to increase your summer wardrobe? Now is the time to sew those capris pants. Summer will be here before you know it!
Judy
No comments:
Post a Comment