Thursday, September 13, 2018


Completion of 11th Wardrobe Piece – Light Blue Shirt

I used the same computer-generated pattern for this shirt as the one I used for the scrappy plaid blouse and the navy print cotton shirt.  I worked on this shirt at the recent American Sewing Guild Lansing Chapter’s sewing retreat in Shipshewana, Indiana.  However, I took it home to put the finishing touches on it.

I needed to make the buttonholes and sew on the buttons.  I thought this was the perfect time to try one of the decorative buttonhole stitches in my Pfaff Creative Icon sewing machine.  I decided to sew a few buttonholes to see which was best for this shirt.  I used some of the same fabric I used for the shirt and applied the same interfacing I used for the front facing.   Using navy thread, I embroidered buttonhole no. 124 and then used a medium blue thread for no. 123 from the “mini” embroidery section in my machine.   A close-up photo of both buttonholes is shown below.  I liked both buttonholes, but both were too large for my shirt.


Being anxious to complete the 12-piece wardrobe, I decided to move on and just sew regular  buttonholes and perhaps embroider a separate design between them.  I located an embroidery design of three small flowers which was also in the “mini” embroidery section of my machine.  I decided to embroider that design between where each buttonhole would be sewn on my shirt.   I pulled back the front facing before I embroidered the design so the back of the embroidery would be hidden inside the facing.  Then I sewed a regular buttonhole through the shirt and facing between each embroidery design.  I also placed one of the small flowers on each of the collar points.  A picture of the finished shirt and closeups of the embroidered designs are shown below.


There is just one piece of this wardrobe to complete and that is the tan jacket.  I am trying a different pattern so it will take a little extra time to check the fit.  I hope to complete the jacket soon.  I believe I will be able to get close to 72 outfits from the 12-piece wardrobe.  I will explain how this is accomplished as soon as I complete the jacket.  Please stay tuned!

Judy

Monday, August 27, 2018


Response to Comment on Recent Post  

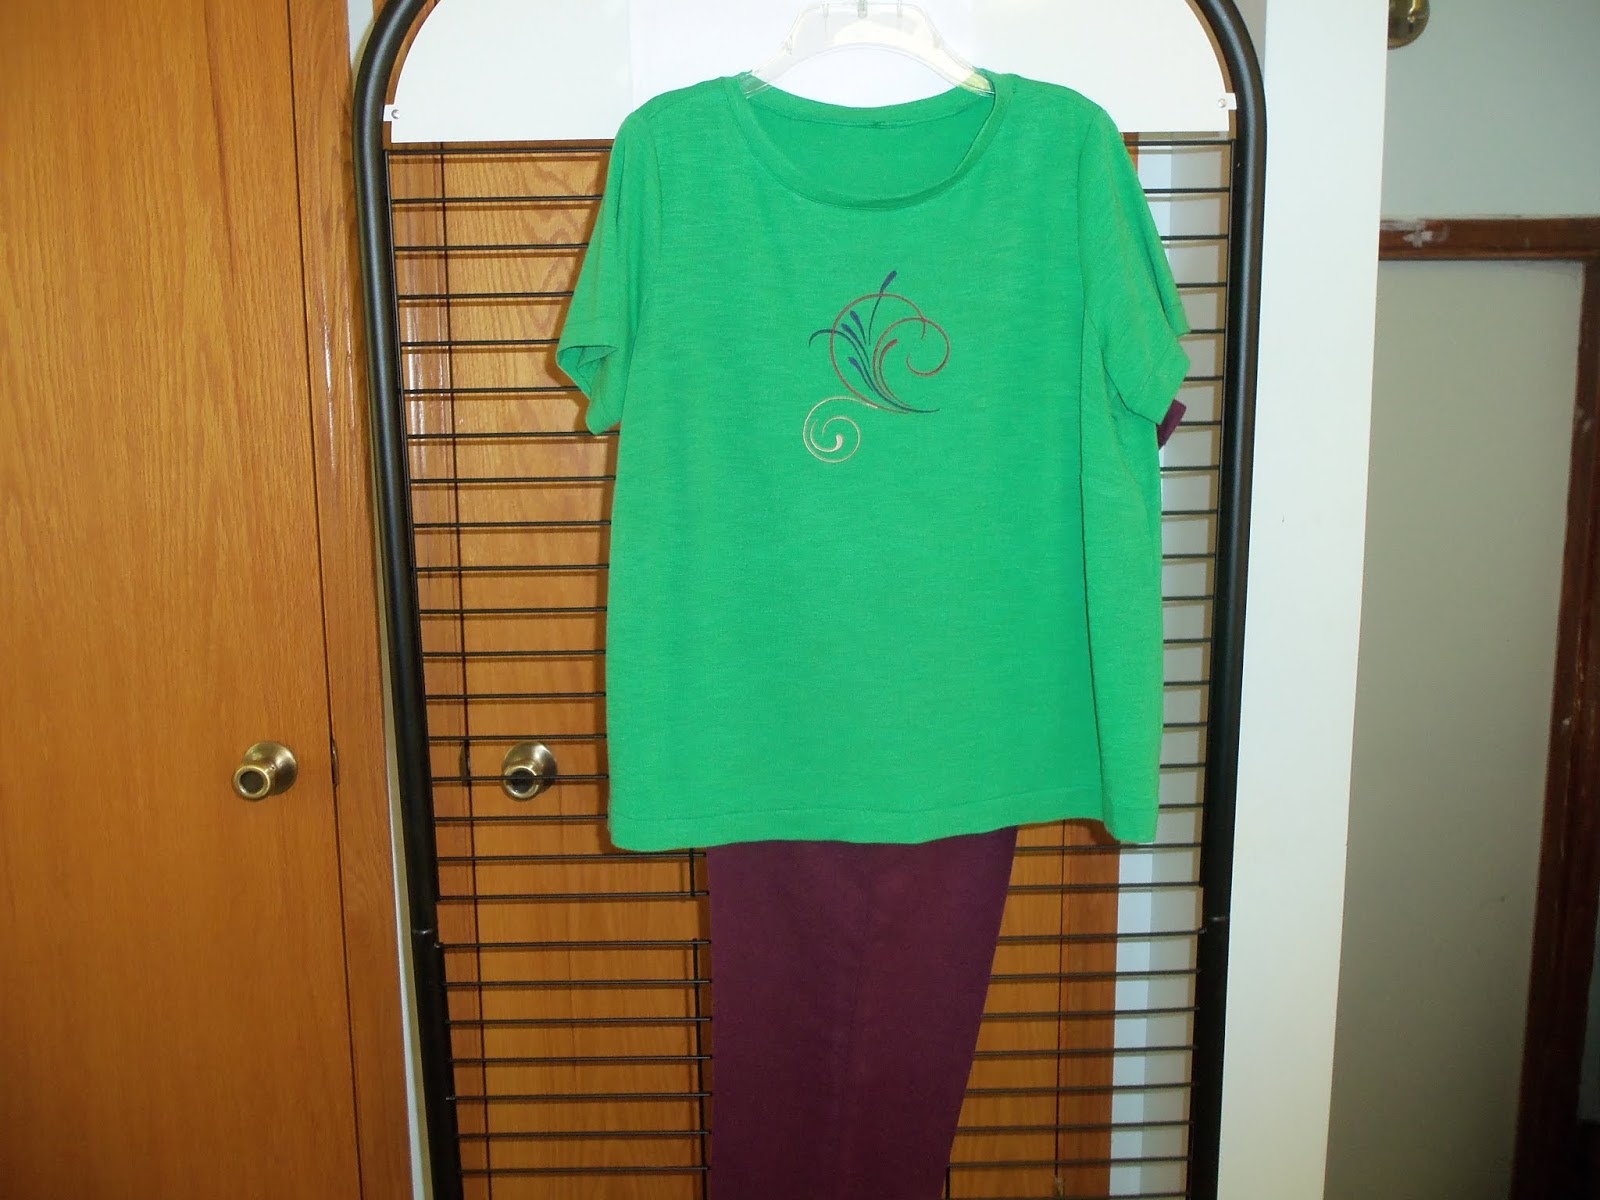
I received a comment on my Aug. 23rd post, “Taking Risk with Color”.  That person asked if I could show a picture of the kelley green top with the wine pants so readers could determine if the two looked okay together or not.  I think that is a good idea.  I realize I am not good with colors, so I do not want to rely on my own opinion.  I have included a picture of the two items along with a closeup. Hopefully you can see the colors better in the closeup.  


It is not a big deal if the two do not coordinate.  I know the green looks good with the beige pants, the navy pants and the navy skirt.  So, I will be able to include the top as part of the 12-piece wardrobe.  

The only difference it makes is the total number of outfits made with the wardrobe.  If the green top does not look good with the wine pants, I will still have 68 outfits from the wardrobe.  If the green top does look okay with the wine pants, I will have 72 outfits from the wardrobe.  I consider either number great for my efforts in making the wardrobe.  I will be happy with either!

I am interested in your opinion.  You can make a comment in the "Post a Comment" section at the bottom of this post. 

Thanks,

Judy

Thursday, August 23, 2018


Taking Risk with Color  -      
       
As I was planning the 10th article of clothing for my 12-piece wardrobe, I decided to step out of my color comfort zone and try something different.   I decided to make a top using a kelly green knit fabric.  I used navy, tan, and wine for all the bottom pieces (skirt and pants) and I used prints and a plaid with those colors for the first four tops.  Kelly green will take me in a different direction, but I think it will work.  I know it works with navy and tan, but does it work with wine?  I am not sure, but I am going to risk it! 

I used the same pattern that I used for my color-blocked knit top.  It is McCall’s pattern M6964.  That is the great thing about reusing a pattern.  You don’t have to spend any time fitting it.  The same pattern will look different when made with different fabrics or by changing a small detail.  I decided to add an embroidered design to the front of the top.  A close-up of the finished design is shown below along with a picture of the top.


I am publishing this post while I am at the American Sewing Guild Lansing Chapter’s Sewing Retreat.  We are at the Farmstead Inn in Shipshewana, Indiana.  Fifteen of us are sewing in a large room with lots of sunlight.  For those of you who have never been to a sewing retreat, it is a really fun experience for a dedicated sewer!  I have been asked if I would accomplish more if I simply stayed at home and sewed by myself.  Perhaps, but there is much more than simply sewing involved here.  I learn so much by interacting with all these talented, creative women plus I have no responsibilities to cause interruptions.  I don’t have to stop to prepare meals, wash dishes or do laundry.  And the ideas I get are endless.   This is the second day of this retreat.   There is a baby quilt in progress, a finished crib sheet, a queen size quilt top finished except for the border, a partially finished Halloween tree decoration, a table runner in progress, an almost done blouse, two pillow cases, two quilts in progress, some quilt blocks for a block swap, a doll dress, two tops, two pants, one messenger bag in progress, coasters, quilted wall hanging, the beginning of a coat, and five purses.  

Last night we ate dinner in an Italian restaurant in Middlebury and tonight we are eating American food in a different restaurant in Middlebury.  We sew anytime and for as long as we can stay awake!  I started this morning at 7:00 a.m.  My assessment of sewing retreats is they are a great place to learn new skills and get ideas from others.  You will accomplish more if you plan what you are going to sew before you go.  It also helps if you do some prep work on your projects.  For example, cut out all pieces and iron on the interfacings before you leave.  Then you are ready to sew upon arrival. 

We have our dates for next year’s sewing retreat set.  It will be here in Shipshewana from September 11 – 14.  All of us are looking forward to it already.

I hope your sewing projects are going well and I hope a sewing retreat is in your future!

Judy

Friday, August 3, 2018

Navy Print Shirt and Craft Show Items


For the navy print shirt, I decided to use the same computer-generated pattern I used for the scrappy plaid shirt.  I did not like the length of the plaid shirt, so I shortened the pattern by 1 ¼  inch.  This shirt is also made from 100% cotton, but feels different because it is not a pieced fabric like the scrappy plaid and also it is more tightly woven. 

I thought this shirt would be even easier to sew than the previous one because I believed the fabric quality was better.  The collar/collar stand piece went on without a hint of a problem.  However, the sleeves did not go into the armscye on the first try. 

I remembered to try the 3-thread overlock stitch on my Babylock Ovation serger for finishing the seams.  I did not like it on this fabric.  The 4-thread overlock stitch provided more stabilization for the individual seams.  I like the look of the pressed open seam with both sides of the seam serged separately.  The 3-thread overlock stitch would probably have worked if I had serged both sides together and then pressed the seam to one side.  It is a personal preference and I prefer the look of the pressed open 4-thread overlock stitched seam. 

A picture of the navy print blouse is below.


I am not especially good at choosing colors which is probably why I don’t get excited about quilting.  I do quilt, but it is not my favorite thing to do.  I am learning more about colors as I continue to work on this coordinated wardrobe.  At the last American Sewing Guild (ASG) chapter meeting, I discussed a color choice for my next piece of the wardrobe with Mary A.   We were looking at a piece of double sided fabric.  One side was royal blue and the other side was navy.  I was wondering if the royal blue would look okay with the navy pants I made.  Mary told me she read somewhere that all blues look okay together.  Then I remembered something my quilting friends told me.  They said that all greens can be used together.  Maybe I should be a little more adventurous when it comes to choosing colors for my wardrobe.

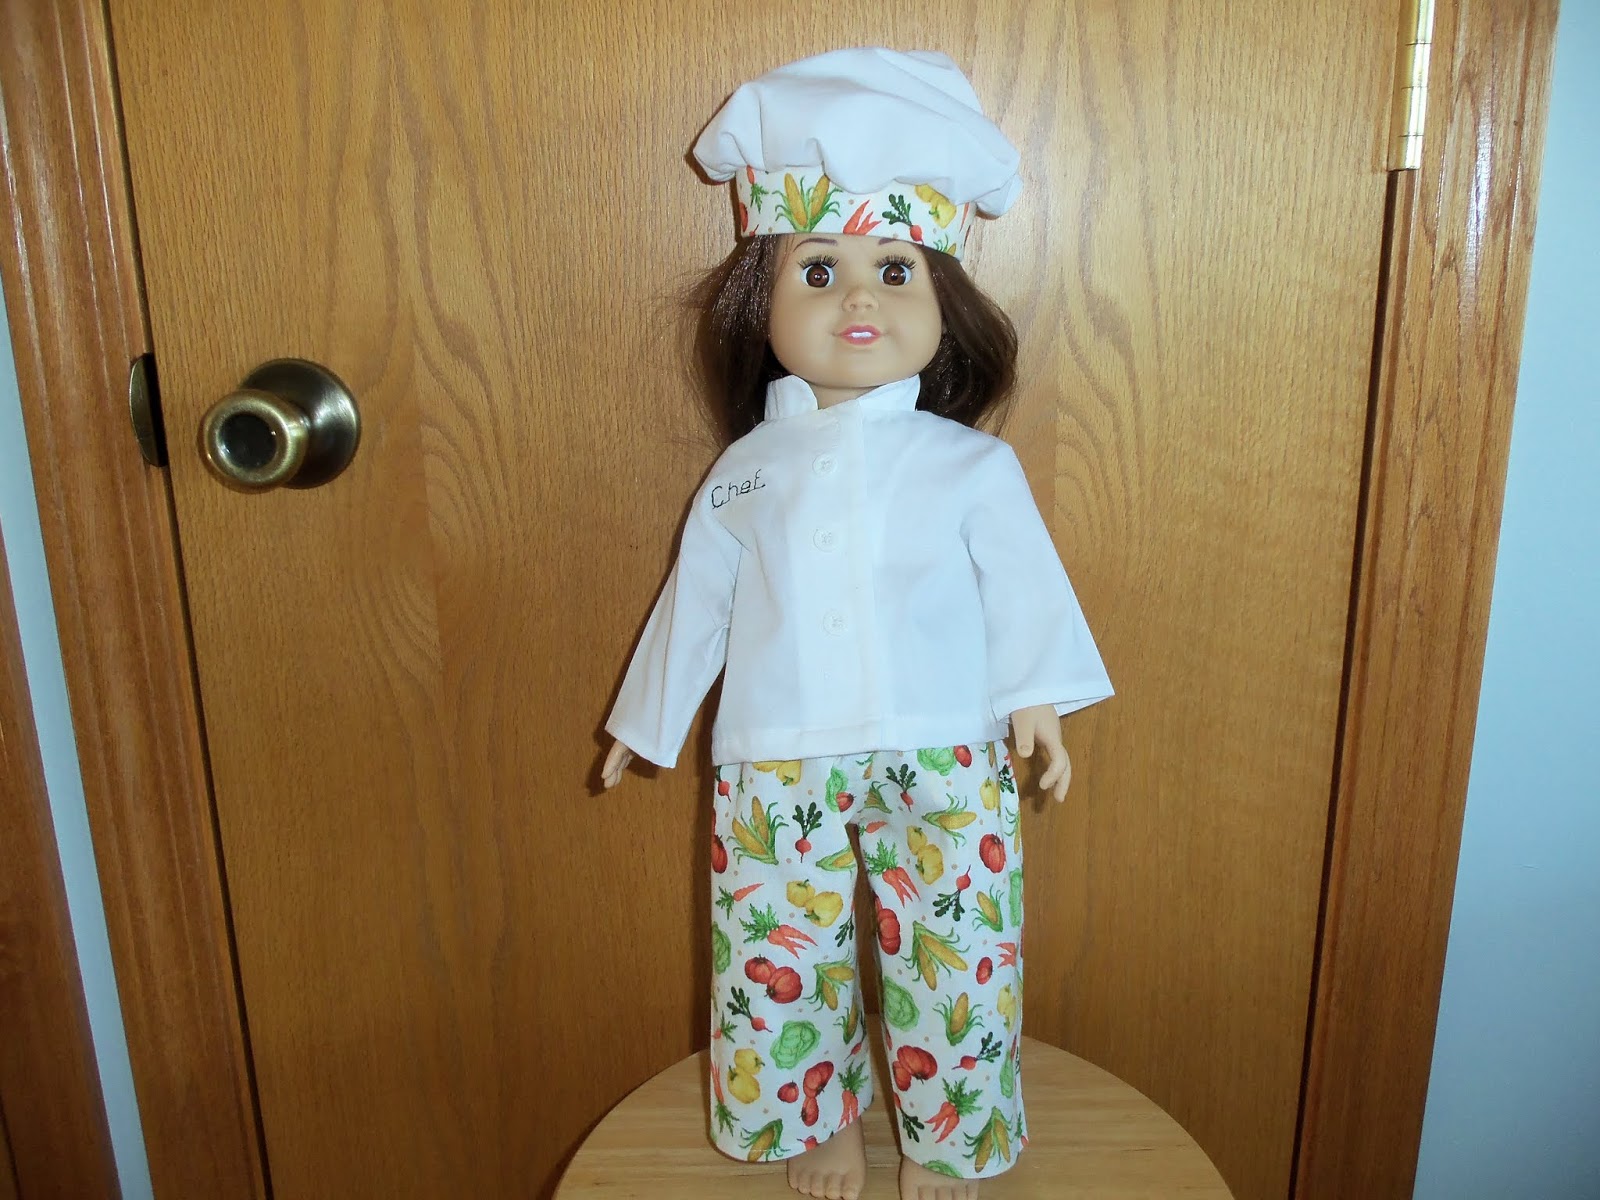
In addition to working on this wardrobe, I had to take a little time to sew something to contribute to the ASG for the craft show at Country Stitches.  I made a baby blanket and a chef’s outfit for an 18-inch doll.  Pictures of those articles are shown below.  The craft show will be held Thursday, August 9th at Country Stitches from 10:00 a.m. – 4:00 p.m.   There will be lots of vendors and Country Stitches will be holding a sale to celebrate its 36th year in business! 


I plan to make a green knit top for my 10th piece of this wardrobe.  After that, I just have one other top and one jacket to sew to complete the 12-piece wardrobe.

I hope your sewing projects are going well.

Judy


Tuesday, July 24, 2018

My Scrappy Plaid Shirt


Years ago, I had my body image scanned into a computer in order to have patterns made for me from that scan.  It actually worked!  The patterns purchased from that company were really a fairly good fit.  Since that time, I have made some minor adjustments to the shirt pattern.  I think maybe it was too difficult and expensive for most people to travel to the company to have the scan.  So, the company did not survive.  I recently decided to use that pattern for a shirt for my summer 12-piece wardrobe.

When I first began to plan this wardrobe, I found a piece of scrappy plaid fabric in my stash.  If you wonder what “scrappy plaid” is I would describe it as a plaid fabric that has been cut into many small pieces and then sewn back together in no particular order.  This fabric has been in my stash for many years and I wondered if I would ever think of anything to make with it.  There are lots of colors including pinks and blues in the fabric, so I thought it would look okay with the navy, wine, and tan pants in my wardrobe.  I decided to try a shirt.  The worst that could happen would be the shirt would end up in the trash and the best would be I might actually like the finished product.

The computer-generated pattern I used for the shirt had a collar band and a collar.  I decided it would be easier to work with the scrappy plaid fabric if those two pieces were combined into one because there were already so many small seams in the fabric.  I traced the two pieces together and then made some changes to accommodate the overlapping seams. 

After cutting the pieces of the shirt, it was fairly simply to sew together.  I finished the seams by serging them.  I used the 4-thread overlock stitch on my Babylock Ovation serger.  I just read somewhere that is better to use a 3-thread overlock stitch when finishing seams because the seam will be less bulky and you use less thread.  I hope I can remember to try the 3-thread overlock on my next blouse to see if I like that better.  It is hard to break old habits, especially when sewing.  Techniques are always changing and frequently new ideas can make a real difference in the appearance of a garment and also in the amount of time required to complete the garment.

Below is a picture of my finished scrappy plaid blouse.


I hope your sewing projects are going well.  Are you giving some time to teach those who would like to learn from you?  A great place to start is right in the family!  Make sure you pass on your love of sewing and your sewing skills to your children and grandchildren.  

I know it is difficult at times because children sometimes don't realize they may have a need and even a desire to sew later in life.   I think my oldest daughter now wishes we had taken the time when she lived at home for her to learn more about sewing.  Now that she lives near Atlanta, Georgia and I still live in Michigan, it is difficult to get together to sew.  

I wish I had made more of an effort to find the time and patience to teach both my daughters to sew.  It is difficult to find that time when we are trying to raise children and work, but I know there are women who are able to do that.  On the other hand, it is never too late to teach someone to sew.  Just use whatever time you have and make it happen!

Judy

Thursday, June 21, 2018


Another Top Finished for My 12-Piece Wardrobe

I just finished a t-shirt top for my summer 12-piece wardrobe.  I used McCall’s pattern M6964 to make a short sleeve version with a rounded neckline.

I wanted the top to coordinate with my navy pants, wine pants, beige capris, and navy skirt.  I found a printed knit fabric in my stash that had colors that would work with all the bottom pieces.   I also had a piece of wine colored knit fabric.  Neither piece was large enough to make the top, so I decided to make a yoke and sleeves from the wine fabric and make the rest of the shirt from the print fabric. 
 
I took the front and back pattern pieces and drew a line on both where I wanted the yoke to end.  Then I used pattern paper to trace pieces for the front and back yokes and also for the lower front and lower back.  I added 5/8 inch for seam allowance to the bottom of both front and back yokes and to the top edge of the lower front and lower back pieces.  After I sewed the front yoke to the lower front and the back yoke to the lower back, I just followed the pattern directions to complete the shirt. 

A picture of the completed top is show below.


 A simple t-shirt top can be completed in a short length of time if you have a pattern you know will fit.  If you are making one for the first time, try a pattern such as McCall’s M6964 that gives directions on how to fit the pattern.  This particular pattern uses the Palmer Pletsch “Tissue Fitting Method.”  The guide sheet also gives some good tips for sewing with knits.  Make sure you check the back of the pattern envelope to determine what types of fabric are suggested for the garment.  I usually buy an inexpensive piece of fabric or even a remnant when I am using the pattern for the first time.  You can use more expensive fabric after you make any necessary fitting changes to the pattern.  That is also a good time to make changes to the design if you desire. 

If you have not sewn a garment for yourself in a few years, making a t-shirt top is a good way to get started again.  A top like this is easy to make and can be completed quickly.  I hope you will try one!

Judy

Sunday, June 10, 2018


Navy Skirt                  

I finished the navy skirt using Vogue pattern V7937.  You will notice the pictures on the front of the pattern envelope are illustrations, not photographs.  That can cause a problem.  With some patterns the illustrations are very close to the finished garment, but other patterns can have subtle differences between the illustration and what would have been evident in a photograph.   The view I made (D) showed an illustration of a slender, tall model.  The flounce on the back of the skirt was slightly longer than the front of the skirt and covered the center of the lower back of the skirt.  It really looked nice! 

When I finished sewing the skirt, the flounce was very full and a lot longer than the front.  I realized the problem was me.  I am not a tall, thin illustration.  I am a short, round real person!  So, I needed to try to make a change to the skirt that might improve its look on my body.  To help you visualize what I did and why, I am showing you pictures of the original skirt before hemming.  I purposefully had the photographer (my husband) stand as far away as possible hoping the skirt would not look quite as bad on me as it actually did!


After musing over my problem, I decided it might look better if I could shorten both the front and back of the skirt.   The back needed to be shortened even more than the front.  I knew by doing this, I would take a lot of the fullness out of the flounce and that was exactly what I wanted to do.  So, I cut off 1 ¼ inches from the front of the skirt and 2 inches from the middle of the back edge and gently curved it upward to meet the sides of the front.  The change is probably not significant, but it did make a little difference.  At least I feel better about wearing the skirt.  I don't think I will feel like quite as much of a frump as I did with the longer, flouncy version.  The finished product is shown below.


I turned up 1 ¼ inches for the hem and pressed.  I planned to use my blind hem foot for the hem, but I decided that might not work well considering the rounded edge of the back of the skirt.  I hemmed it by hand instead.  

I made two changes to the pattern.  The pattern did not have a waistband.  Instead, it used a facing to finish the waist edge.  It is a matter of preference, but I don’t like a faced waist edge.  So, I added a waistband.

I also prefer a skirt with a lining and Vogue V7937 was an unlined skirt pattern.  I made a pattern for the lining by tracing the sides and waist edge of the front section after the three individual pieces were sewn together.  Then I traced the sides and waist edge of the back section after the six individual pieces were sewn together, but before I sewed the front to the back.  I made the lining stop just about where the gores began to flare out in the back.  The lining stabilizes the back of the skirt when I sit and also acts to prevent seeing through the skirt. 

This will not be my favorite skirt, but I will wear it.  If I make another one from this pattern, it will be view C.  View C has pleats in the back and the back is the same length as the front.   I will shorten the pattern before cutting the fabric.

I enjoy trying different patterns because it is always a learning experience.  I learn more about which styles I like and which look best on me.  It is also an opportunity to learn new techniques.   I learn not only new sewing techniques, but sometimes techniques for rescuing a project from being thrown into the trash! 

How are your sewing projects going?  I hope they are successful and I also hope you are learning as you are creating them!

Judy