Saturday, May 29, 2021


A Time to Sew

We are well into spring now and summer is fast approaching.  There is so much to do!  When I wake up each morning, I hardly now where to start.  It seems that everybody is busy.  Most of us went from doing almost nothing in 2020 to being overwhelmed with things that now must be done or things that we want to do just for fun.

I have had very little time to sew lately.  My regular housecleaning chores keep calling me as well as preparing for a garage sale.  We are attempting to unload our basement of all the “stuff” we keep relegating to a spot down there.  To add to all those “must do chores”, our yard keeps screaming for attention.

My husband gave me an ultimatum.  Either clean the flower beds or get rid of them.  I knew at my age and in my current physical condition, I wasn’t going to be able to do the work.  I decided to call Smith Lawnscapes in St. Johns.  I discovered that getting rid of the flower beds would be expensive, so I decided I might as well try to save them.  Smith Lawnscapes did the hard work for me.  They did the weeding and pulled out the dead or just plain ugly plants.  All we had to do was purchase the plants and pay for Smith’s services.  After visiting approximately 15 greenhouses in both Michigan and Indiana, we had all the replacement plants.  Smith Lawnscapes returned and put in the new plants and pulled more weeds.  They did a great job and now our yard looks a lot better.  The best part is they will return once a month to keep things looking good!

The decision to hire a lawn service was difficult for me to make.  I don’t relish the idea of having someone else clean up my mess, but I know my limitations.  I also want some time to sew and this will give me time to do that. 

I remember the book, 10-20-30 Minutes to Sew, by Nancy Zieman.  Nancy advised sewers to set aside small units of time and work on small increments of a sewing project.  In one of those time slots, you could gather the supplies, prepare your pattern, cut out the project, mark the pieces, add interfacing, or sew seams.  The idea is to do one thing at a time.  You don’t need to complete the project during one session at your sewing machine. 

We all have 24 hours a day.  If we want to spend some of that time sewing, we need to allocate time for it and be ready to sew.  It can be done.  It is nice if you have space where you can leave your project out and ready to sew when you have another “sewing allocated” period of time.  That way you don’t waste any time setting up to sew.  Even if you have to put your project away, if you keep everything together, you can use those small increments of time to work on a project.

Many years ago, I walked each morning with two of my neighbors before getting ready for work.  I told them I was making my daughter’s wedding gown and the gowns for her maid of honor and bridesmaids.  Both Lynda Roof and Judy Boettger offered to help.  We were all busy, but we decided to give up our morning walks and instead use that time from 5:00 a.m. – 6:00 a.m. to work on the gowns.  I had sewing machines and a serger set up each morning with everything ready to sew.  This worked and was so much fun!  I have really great neighbors.  We all still live in the same neighborhood and I will always be grateful for their help. 

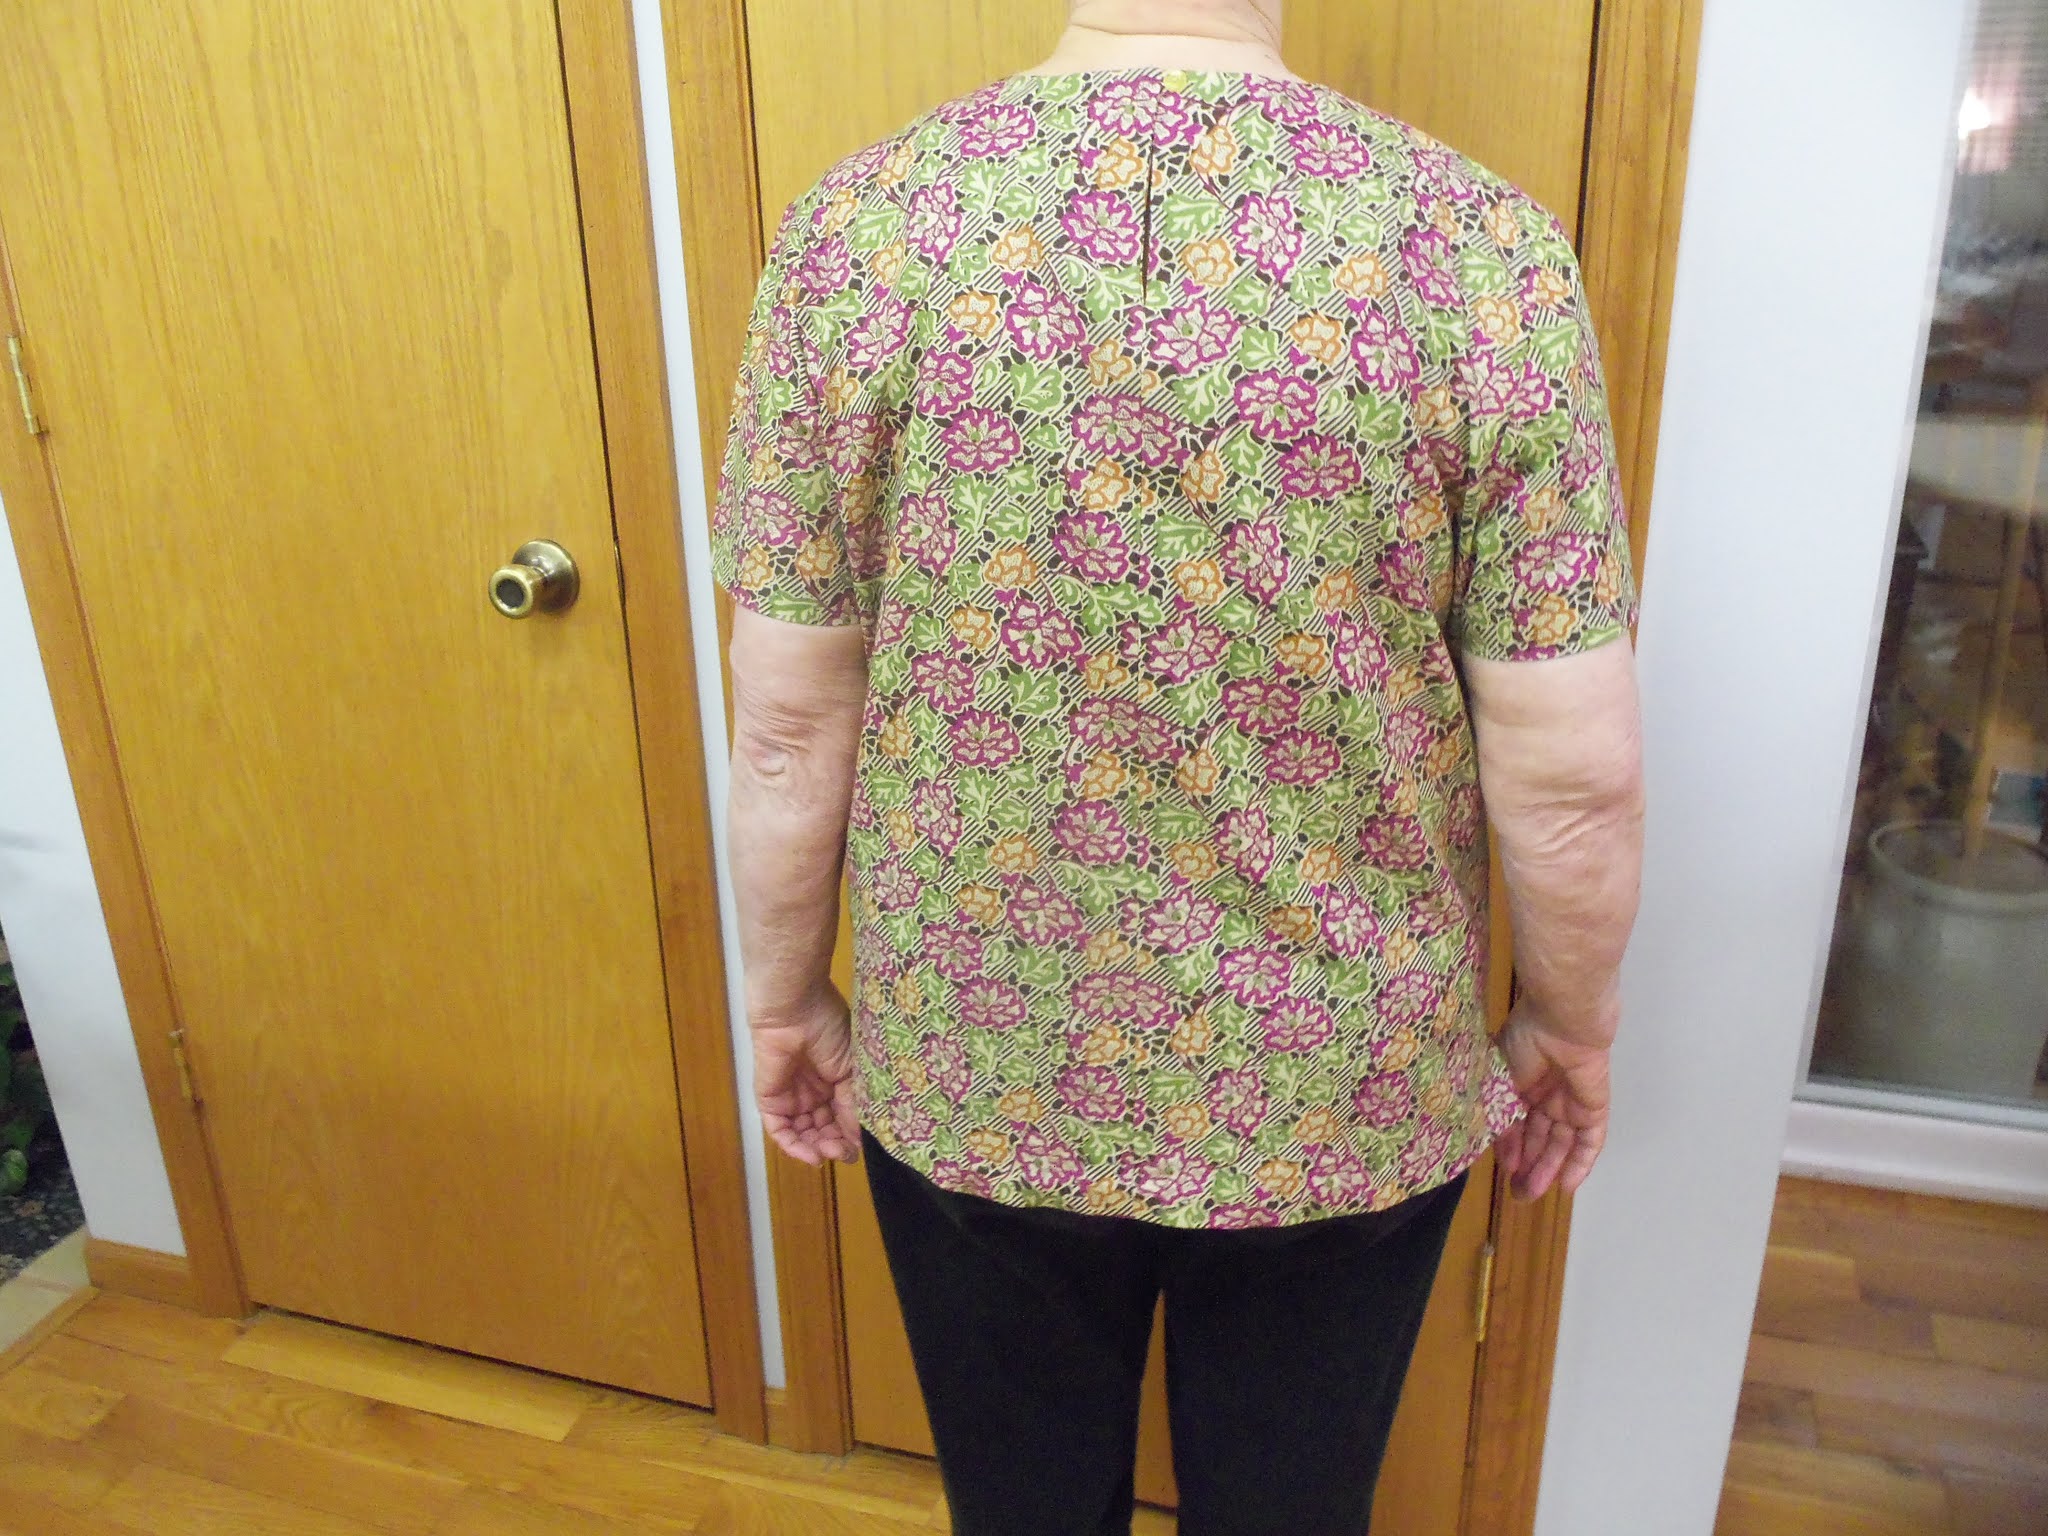
Although I haven’t had a lot of time to sew recently, I have finished two projects.  Pictures of the items are shown below. 


I made the lime green capris from fabric given to me by a member of the American Sewing Guild, Colleen Bofysil.  A couple of years ago, I made a skirt from the same piece of fabric.  I still have another length of the same fabric, but am not quite sure what I will sew from it.  Maybe I will make a coordinating jacket for the skirt and capris pants.

Save some time to sew and have fun doing it.  Remember, if you can only sew a few minutes, those minutes will be enough to eventually complete a project.  This is definitely better than not sewing at all!

 Judy


Tuesday, May 4, 2021


It Is Almost Here!

It is coming!  I can feel it.  I can almost see “normalcy” on the horizon.  The snow has gone.  Spring has sprung and people are beginning to meet each other outdoors and in very small groups indoors.  I know we aren’t there yet because Michigan’s Covid-19 numbers are still high, but there are encouraging signs.  I think we are well on the way to a better year than the one we just experienced. 

I am looking forward to the return of our regular in-person sewing guild meetings.  I want to see the projects everyone has made and not view them over zoom.   I want to view live demonstrations of sewing techniques without struggling to view them on-line.  Our Zoom meetings have been better than not having meetings, but there is nothing like a real in-person gathering of sewing enthusiasts. 

The Lansing Clippers’ charity sewing project for this year is the same as last year.   We are continuing to make clothes for babies and toddlers to give to the Infant and Children’s Closet at Pilgrim Congregational Church in Lansing.  Recently, I focused on making items for this charity.  I needed something simple to sew after all the fitting and pattern hacking I had done for my last few posts.   I told myself I would do some “mindless sewing”, but mindless sewing is not a real thing.  All sewing takes concentration, even simple sewing.  Yes, the patterns I used to make the children’s clothing were simple, but I still had to focus on what I was doing.  For example, after I finished the purple shorts, I noticed that I made a mistake when I finished the edge of one of the side seams.  As I serged the edges of the seam, I caught part of the shorts under the serger needle and serged it into the seam.  Fortunately, that part of the shorts didn’t get under the serger knife, so I was able to rip it out and re-serge the seam.  A picture of the garments is shown below.


As part of the simple sewing, I also made some baby items to be used as a shower gift.    I made 3 small bibs, 3 larger bibs, 3 burp cloths, and a couple of receiving blankets.  This would be a good project to start if you haven’t sewn in a while and just want something simple to do to get back into sewing again.  As I said before, no sewing is really mindless sewing but there are a lot of simple projects you can sew.  A picture of the baby items is shown below.


If you need a project to sew, just google whatever you have in mind.  There are all kinds of projects with on-line instructions just waiting for you!  Sewing can be relaxing and fulfilling.  It is also a hobby that can be shared.  Sewing with a friend is twice as fun as sewing alone.  You can learn from each other and creativity seems to flow easier when you can collaborate with others.  Even if you can’t get together with others yet, make some plans to sew with others as soon as the conditions allow. 

Have fun sewing!  If I can answer any questions for you, please let me know.

Judy 

Wednesday, April 21, 2021

                                                     Button Down the Front V-Neck Blouse

I decided once again to hack the pullover top with a back slit opening made from Simplicity 8061.  I wanted to use that pattern to make a button down the front v-neck blouse.  A picture of the completed blouse is shown below.


I fitted the original pattern (Simplicity 8061) last December and blogged about the process.  Since that time I have done pattern hacks to it to make other styles without having to fit a new pattern each time.   A picture of Simplicity 8061 is shown below.


To make this hack, I needed to make changes to the front pattern piece and to the front neck facing.  I could make a separate sew-on facing or add one onto the front pattern piece.  I decided to add the facing to the front.  The front neck facing would need to cover the v-neck front opening and extend down to the hemline of the blouse.  I began by tracing the front pattern piece from the Simplicity 8061.  I measured down on the center front and marked where I thought I wanted the low point of the v-neck to be.  I measured 5/8 inch up from that point for the seam allowance.  I took a ruler and tried to draw the sides of the v-neck, but I did not like the results.  Instead, I used a French curve and drew a gentle curve up from the v-point to the shoulder line.    

Next, I needed to add some space to the center front to accommodate the buttons and buttonholes.  This space would become the overlap of the front.  I drew a line 3/4 inch from the center front that ran from the neckline down through the hem.  The picture below shows the front pattern piece after making adjustments for the new neckline and front opening.

The next step was to draw the front facing.  I taped another piece of paper to the pattern because there was not enough room to draw the extension for the front facing.  I folded the paper on the line I drew for the overlap space for the buttons and buttonholes.  After I folded the paper, I could still see the new line for the neck opening.  I traced the neck opening and also along the shoulder line for 2 ½ inches.  I measured out 4 inches from the beginning of the overlap line at the V-point and marked the spot.  Then I measured out 2 1/4 inches from the overlap line at the hem and made a mark.  I made another mark  two and one-quarter inches from the overlap line directly across from the bust dart.  I drew a line from the mark at the hem up to the mark across from the bust.    I drew a curved line from there up to the mark at the center of the neckline.  I used a French curve to draw a line from there up to the mark on the shoulder line.  My front neck facing pattern was complete.  

The first picture below shows the pattern paper folded over the front piece and the lines drawn for the facing.  The second picture shows the entire front piece after the addition of front facing.   


The next picture shows the pattern piece for the interfacing.  As you can see, I just placed pattern paper over the pattern and drew the facing beginning at the center front line of the pattern.  I could have started at the overlap line, but by starting at the center front, it will give the button hole and buttons area a little extra support.  


I found a piece of fabric in my stash that was 54 inches wide.  It is a “linen-look” fabric that I like because it does not wrinkly easily.  Also, I was able to fold the fabric lengthwise and it was wide enough to cut the two front pieces.  I found that if I folded 45-inch wide fabric lengthwise, it was not wide enough to accommodate both fronts.  If I use the pattern with 45 inch wide fabric, I will have to lay the fabric in a single layer and cut each front individually.  Of course, the other option would be to cut the facing separately from the front piece with the addition of a seam allowance on both pieces.

This was an easy pattern hack to make.  It was just a matter of thinking through the process of making the front facing and allowing room for the buttons and buttonholes.  After I cut out the blouse, I put it together as I would any other blouse.  After I sewed the back facing together, I attached it to the front facing and then sewed both facings to the neck edge.  After adding the sleeves, it was simply a matter of hemming the blouse to complete it. 

After you have a pattern that fits, it is so much easier to hack that pattern to make different styles rather than keep fitting a new pattern each time.  So far, I have made four tops from this pattern.  They are shown below.


I hope you have fitted a pattern for yourself and are busy doing pattern hacks to make a complete summer wardrobe.  Have fun sewing!  I appreciate your comments or questions.  If you have either, please let me know.

Judy


Wednesday, March 31, 2021


Pattern Hacks

Recently I spent a lot of time fitting a pattern for a top for me and writing down each step of the process so I could do a presentation on fitting for the Lansing Chapter of the American Sewing Guild.  I think I got more out of the presentation than anyone else!  It was an eye-opener for me.  It proved to me the benefits of fitting a pattern and then making changes to that pattern for additional garments.  So much time can be saved by simply making changes to a pattern that already fits you instead of fitting a new pattern each time you make a different garment.  Of course, I knew this, but rarely took advantage of the fact by actually doing it.

I used Simplicity pattern 8061 and posted the instructions for fitting on my blog.   The pattern was a short sleeve top with bust darts and a jewel neckline.  Shortly after finishing that top, I decided to make another one using the same pattern, but did not have enough fabric.  I decided to cut the front and back pattern pieces apart and make yokes out of one fabric and the bottom of the front and back out of another fabric. 

Without realizing it, I was doing a pattern hack.  A pattern hack is making changes to a pattern that creates a different design from the original pattern.    It might be making a simple change like making the garment longer or shorter or you might use sleeves from a different pattern; or maybe you make a top or blouse into a dress or move bust darts to the shoulders or neckline.  There are many, many ways to change a pattern to make it your own.  This is much simpler than fitting a different pattern each time you make a garment. 

I decided to hack Simplicity 8061 at least one more time.  I wanted to do something different to the sleeves this time.  I recently purchased McCall’s M8161 pattern because I liked the different sleeve options.  One of the options offered was a wide pleated band at the bottom of the sleeve.  A picture of the pattern envelope is shown below.


I decided to make two changes to my Simplicity pattern.

1.  Lower the high jewel neckline in the front by ½ inch.

2.  Add a pleated band to the sleeve.

The first thing I did was make the neckline lower.  I measured down from the neckline at the center front ½ inch and then used a French curve to extend the curve from the front up to the shoulder seamline.  I did not take much off the side front neckline; most of the lowering was done at the center front. 

Change no. 2 took the most time to do.  I made a mockup of the sleeve and band before I cut them out of my fashion fabric.  I used some tan fabric from my stash to make the mockup. 

I knew the sleeve needed to be shorter if I was going to add a pleated band to it.  I measured about 2 inches down from the armscye at the side seam and drew a line across the sleeve.  I cut off the bottom portion.    I wasn’t sure how wide to make the pleated band, so I looked at the McCall’s pattern and saw that band was 11 inches wide.  I made the length of the band about 2 times the width of the bottom of the sleeve.  I sewed the two small edges of the band right sides together.  Then I folded the band in half lengthwise with the wrong sides together.  I basted the raw edges together.  I pinned the pleats in place using the markings on the McCall’s pattern.  When I checked to see if the pleated band was the same size as the edge of the sleeve, I noticed the two pieces did not quite fit together.  The band was a little too small.  I adjusted each of the inverted pleats by 1/8 of an inch.  Then I was able to sew the pleated band to the right side of the bottom of the sleeve.  A photo of the mockup of the sleeve is shown below.


 To decide if I liked the look of the sleeve, I pinned it over a sleeve on a top I previously made with simplicity 8061.  I liked the look, but did not like the length of the new sleeve.  It came to just below my elbow.  I decided these sleeves might look better on me if the pleated band was narrower.  I decreased the width of the band pattern piece by 2 ½ inches.  A picture of the completed top is shown below. 


So far, I have sewn three different tops from Simplicity 8061.  I think my next project will be to convert this pattern to a blouse that buttons down the front.   I enjoy the process of sewing different tops without having to take the time to fit a new pattern.  I will let you know how my next pattern hack goes.

I hope you are working on a fun project!

Judy


Tuesday, March 16, 2021

Fitting a Pattern for Capris with an Elastic Waist

I suddenly realized today that spring is not far away.  The sun is actually shining and the snow and ice have melted.  Maybe I should think about updating my spring and summer wardrobe.  I haven’t really needed any new clothes this past year because I wasn’t going anywhere to wear them.  Maybe this year will be different!  Perhaps we can get together with friends soon if all of us get our Covid-19 vaccinations.  Maybe we will be able to go to church, out to eat, and even travel to see family.  I sure hope so!

I don’t have any summer pants with elastic waists.  So, I decided to fit a pattern for capris using an elastic waist.  If I don’t like the look, I can convert the pattern to one with a fly-front.  I pulled Simplicity 9674 from my stash.  The pattern consists of just two pieces, the front and back of the pants.  The waist is cut and folded over to form the casing for the elastic waist.  I measured my hips and chose the size based on that measurement.  I measured across both pattern pieces from seamline to seamline to make sure there was enough space to equal my hip measurement plus some extra for ease.   When you are making pants with an elastic waist, you need to be sure to give yourself enough room to pull the pants up over your hips. 

My pattern does not have any pockets.  I never make pants without pockets, but this time I am.  My goal is to get a pattern to fit me as quickly as possible.  I can fine tune it later by adding pockets and maybe even a zipper.  But right now, I am only interested in getting the pattern to fit!

I know that pants patterns are always too long for me and I could see by holding the pattern up to my body that this pattern was no exception.   The first thing I did to the pattern was to shorten it.  Most patterns have a lengthen/shorten line, but this one did not.  I drew a horizontal line across the leg about four inches down from the crotch line.  I wanted to shorten the pants one inch.  I drew a line one-half inch above the original one and another line one-half inch below the original.  I folded the bottom line up to the top line and this shortened the pattern one inch.  Then I trued the lines on the pattern.

I cut out the first mockup of the pants using some muslin from my stash.  Then I transferred all markings from the pattern to the mockup.  I sewed the mockup together using a long basting stitch.   I tried on the mockup and pulled the pants up to where the crotch should be and tied a piece of elastic to hold them up while I checked the fit.  I had to ask my husband for help with fitting the pants.  He wasn’t exactly pleased, but he agreed to do it.  I made sure the elastic was at my waist and he marked the waist on the mockup with a ball-point pen.  The capris looked okay from the front, but in the back, the legs seemed too full and had vertical wrinkles from just under the derriere to the hem.  This will happen if you have a flat derriere.  I pinched out about one-half inch fabric starting at the derriere and that seemed to solve the problem. 

I checked the Pants for Real People book by Pati Palmer and Marta Alto to see how to transfer this alteration from the mockup to the pattern.    I learned I needed to take a tuck in my pattern from the waist to the hem, even if by doing so, it made the waist and/or hips too small.  This will keep the pants on straight of grain. 

I extended the straight- of-grain line to run from the waist to the hem.  Then I added another line ¼ inch to the right and one ¼ inch to the left of the grain line.  Then I folded the line on the left of the straight-of-grain line to meet the line on the right.  That removed ½ inch from the width of the leg from the waist to the hem.  After making the tuck in my pattern, I added the same amount at the side seams at the waist and the hips and tapered back to nothing just below the bottom of the derriere.  Now, the pants will be the same size in the waist and hip areas as before I made the adjustment, but the legs from the derriere to the hem will be ½ inch narrower.  And the pants will still be cut on straight of grain.

I transferred the waist markings from the mockup to my pattern.  The waist was noticeably uneven, so I smoothed out the line.  The band for the elastic insertion is cut onto the pants pattern.   The elastic I tied around the mockup sat on my waistline and I want the bottom of the elastic to touch the waist.  Therefore, I measured to make sure I had enough room for the band to rise above the waistline and fold over for the elastic enclosure.

 The picture below shows the changes I made to the front of the pattern.  As you can see, the only changes I made was to shorten the length and I moved the waist line down a bit.  


The picture below shows the changes I made to the back of the pants.  I shorten the pants first.  Then I made the lengthwise tuck to take out 1/2 inch from the width of the pants.  I added a piece of pattern paper to the side seam so I could add back the 1/2 inch I took off the waist and hips.


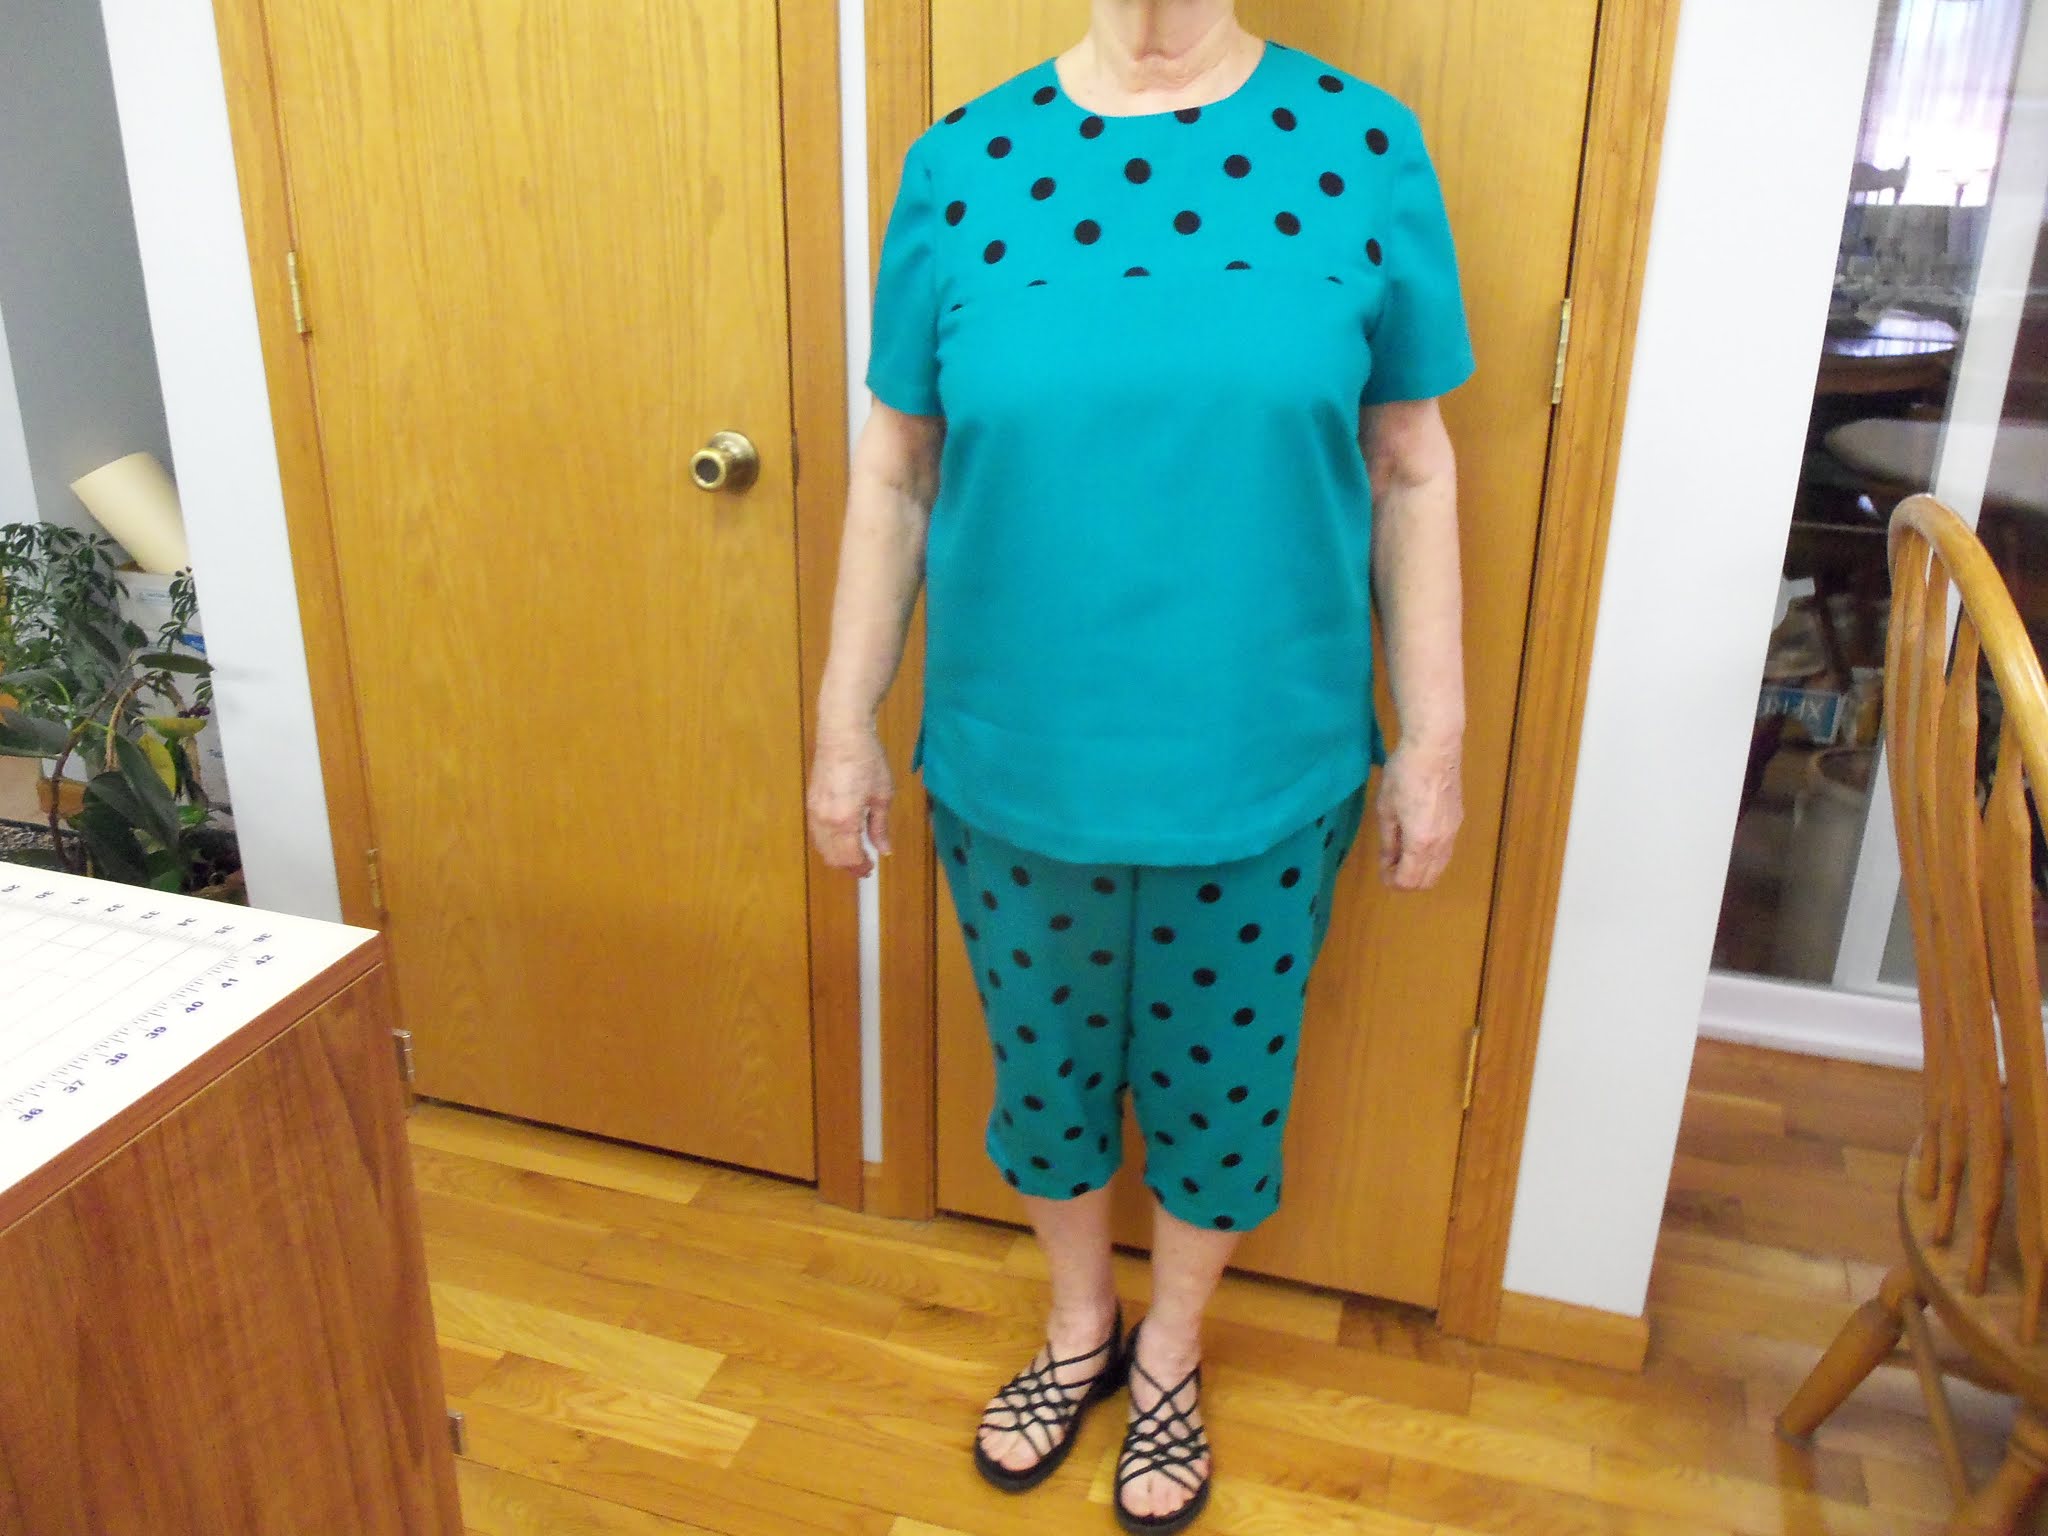
When I searched my stash for fabric to make the capris, I discovered a pice of linen-like fabric that was green with large black polka dots.  I also had a piece of a solid green coordinating fabric, but it was small.  I wanted to make the capris and a matching top from the pattern I fit last month, Simplicity 8061.  A picture of that pattern envelope is shown below.

After comparing the capris pattern and the blouse pattern to the amount of fabric I had, I decided to make the capris from the polka dot fabric.  Then I would have enough polka dot fabric to make a yoke on the front and back of the blouse.  The solid coordinating fabric would be used to make the sleeves and the lower portions of the front and back.  

To make the yokes, I drew a line on the front and back where I wanted the yoke to end.  Then I traced the front and back yokes on a piece of pattern paper and added a 5/8 inch seam allowance to both.  Sewing the blouse together went quickly because I just completed one last month using this pattern.

Pictures of the completed capris and blouse are shown below.  


Have you started a project to increase your summer wardrobe?  Now is the time to sew those capris pants.  Summer will be here before you know it!

Judy


Monday, February 22, 2021


How to Lower the Bust on a Pattern

Michigan has beautiful winters as long as you don’t have to go outside.  However, it is difficult to stay in the house all winter.  I just don’t like the cold.  I was really looking forward to going to St. Simons Island, Georgia to get away from the extreme cold, but we had to cancel our vacation.  We just didn’t feel safe traveling during the Covid-19 pandemic.  So, I am stuck with Michigan snow!  I do realize how lucky I am to have heat, electricity, water, and plenty of food.  Lots of people in this nation are experiencing a shortage of all of those. 

I am entertaining myself by sewing, blogging, and even purging our basement.  I am beginning to realize just how large my fabric stash is.  I put the overflow from my sewing room in large plastic bins in the basement.  I never realized just how many bins I have.  The truth is I can’t possibly use all this fabric.  There are not enough years left on my “earthly agenda” to make something from all this fabric.  We are preparing for a large garage sale in the spring, so I will add some of my stash to the sale.

My last four posts have been discussions about fitting a pattern for a blouse or top.  I decided to use this post to talk about lowering the bust.  There is more than one way to accomplish this, but this is the method I use.  If I am doing a full bust adjustment on a pattern, I will do that first before I lower the bust.  The reason is when you do a full bust adjustment, it will automatically lower the bust some.  I always check after the full bust adjustment is done to see if I still need to lower the bust.

The pattern usually has an apex already marked on it.   The dart should point to the bust but stop about 1” from the apex (point of the bust).  Mark on the pattern where your apex should be.  You can do that by holding the pattern in place against your body or if you have already made a mockup of the pattern, you should have marked the apex on your mockup and then you can transfer it to your pattern.  Next, I drew a box around the dart as shown in the picture below.


Then, I cut out the box and moved it down the amount I needed to lower the dart.  It is important to keep the two horizonal lines parallel when you move the box.  The dart now should point to the apex. 


 Add paper to fill the space you created when moving the box and true the lines of the pattern.


Are you currently sewing a garment for yourself or someone else?  Sewing a garment is a great way to keep your mind active and sharp.  You use your problem-solving skills as well as your creative and engineering skills.  Now don’t tell me you don’t have those skills.  You do!  They may just be lying dormant waiting for you to call them to action.  Use them soon.  Plan to sew a garment for yourself.

Have fun,

Judy

Tuesday, February 9, 2021

Fitting a Pattern for a Blouse or Top

Fitting Topic No. 4:  Sewing a Second Mockup to Incorporate More Adjustments


This is a continuation of Fitting Topics No. 1, 2, and 3 in my series of posts on Fitting a Pattern for a Blouse or Top.  The first three topics were posted Dec, 27, 2020, Jan. 3, 2021 and Jan. 18, 2021.   As indicated in my last post, I found when I tried on my first mockup that I needed to do a round back adjustment as well as lower the bust a little more.  I may also need to do a forward shoulder adjustment.  I wanted to do the round back adjustment first to see if that would take care of the forward shoulder. 

I chose another piece of fabric from my stash to use for the second mockup.  It is a 100% cotton print.  If this mockup fits, I may be able to actually wear the top.  Then I can see if it is comfortable or if it needs some additional tweaking before I cut into expensive fashion fabric.  I cut the front and back pieces and the sleeves.  Before I cut the sleeves, I added ½ inch to each of the sleeve side seams.  That compensates for the additional ½ inch I added to the front and back side seams. 

I sewed the front and back pieces together and tried on the mockup without setting in the sleeves.  The adjustments I made to lower the bust and for the round shoulders worked well.  However, the round shoulder adjustment did not alleviate the forward shoulders issue.  I could see the back shoulder seam needed to be moved forward another ¼ inch.  If I had another person helping me with the fitting process, I would have had that person open the shoulder seam while I had the mockup on and then pin the shoulder seam where it should have been.  Then I could have measured that seam and made the adjustment on my pattern.  Without a helper, I had to stand in front of the mirror and make an assessment of the amount needed.  Then I took off the mockup and made the changes and tried it on  again to check the fit.  Once I had it on, I could look at it in the mirror and also place my fingers on the seam line and feel that it was in the right location.  To offset the extra 1/4 inch I added to both sides of the back neckline at the shoulder seam, I could take 1/4 inch off both sides of the front neckline.  I chose not to do that because I like the extra room at the neckline.  However, I will add 1/4 inch to the seam of the of the back neck facing on my pattern. 


The next step was to try to insert the sleeves.  You can see in the picture above, the width of the back across the armscyes are little too wide.  This is where I really could have used someone to help.  My husband was not up to the task, so I had to do it alone.  I did not want to make the top so snug across the back that I would have difficulty moving my arms.  I decided to baste the sleeves with a 5/8 inch seam and try the mockup on again before determining how much extra seam to take.  After doing that, I decided to take an extra ¼ inch on the seam in the middle of the armscye in the back and gradually decrease to 5/8” again at the shoulder seam and where the seam straightens under the arm.   A picture of the mockup is shown below.


This second mockup fit much better than the first, but the front was a little loose in the hip area.  This sometimes happens when your hips are smaller than your bust and you make the full bust adjustment on the pattern.  One solution is to make a pair of vertical darts in the front.  I added the darts and liked the appearance of the front of the top much better.

I think this second mockup is wearable.  So, my next step was to take it apart and sew it together again with a regular stitch instead of a basting stitch.  I also added the facing to the neck edge and back opening.  The pattern called for a thread loop and button at the top of the back opening.  Because I am not good at making thread loops, I decided to use a small elastic jewelry cording.  I enclosed both ends between the facing and the back when I sewed those two pieces together.  I liked this much better than a thread loop.

Also, I wasn't really happy with the darts I added to the front of the top.  I decided to rip those out and take 1/2 inch off both sides of the front from the hem decreasing to nothing at the waist area instead.  I think this will work better for me.  Pictures of the finished garment are shown below.


This wraps up my series of posts on Fitting a Pattern for a Blouse or Top.  Fitting is a process.  It takes time and patience but the rewards are worth the effort.  Once you have a basic pattern that fits, it can be used multiple times and can be changed into different styles without having to fit another pattern! 

Have fun sewing!

Judy