Thursday, July 29, 2021


Not a Bowl of Cherries Knit Top

Last week I found a beautiful piece of aqua lightweight sweater-knit fabric in my stash.  I decided it was time to use it to make a top.  However, I did not want to use the pattern I have been using.  That pattern (McCall’s M6964) has bust darts.  I do not want bust darts in this new top because the fabric is a ribbed knit.  The fabric is made from a series of a number of knit stitches and then a number of purl stitches repeated throughout the fabric.  I think darts would be a distraction in this fabric.  I have another pattern (Kwik Sew 2900) that I have not used in a while.  It does not have darts. 

I was ready to cut out the new top while I was sewing at a friend’s house with a small group of sewers.  I did not want to take the time to thoroughly check the fit of the pattern, so I just held it up against my body and decided I needed to add ½ inch to the side seams and to the underarm seams of the sleeves.  I cut out the top and proceeded to sew it.  I think I mentioned in one of my other posts that sewing is not always a bowl of cherries.  In other words, things do not always go well.

There are a lot of variables in sewing, especially when sewing knits.  Knits do not all have the same amount of stretch.  There are other variables as well.  One is the weight of the knit.  Some are very thin; others are thick.  Some are slippery and some are stable.  All these factors play a part in the size of the pattern you need and the way the fabric will respond when you are sewing. 

The kind of needle you use in your sewing machine will also make a difference.  Usually, a ballpoint or jersey needle will work on knits.  A regular needle may also work.  If neither a regular or ballpoint needle works for you, you might try a microtex or stretch needle.  Try out the needle on a scrap of the fabric you are using before beginning to sew your garment.  I was able to use a regular size 80 needle in my machine when I sewed this top.

I sewed the shoulder seams together first and I remembered to place a piece of stabilizer in each of the shoulder seams to keep them from stretching.  You can purchase stabilizer in ½” wide rolls and it helps keep the shape of the shoulders.  I inserted the sleeves before sewing the sides together.  These went in easily without basting.  I decided to bast the side seams together because I was not sure of the fit.  I am glad I did.  It was a little large through the body.  I removed the basting and cut off the extra ½ inch I added previously.  I used my serger to serge the side seams and the underarm seams of the sleeves together. 

Next, I attempted to sew the neckband using the same technique I used in the past for most of my tee tops.  When I want a small narrow band, I like to sew a single layer of the right side of the band to the right side of the top and then fold that over to get the desired width.  I stitched in the seam on the front of the top to attach the back of the band to the top.    I had to rip out the first attempt because it looked terrible.  I got the same result with the second attempt.  The band by that time was beginning to shred.  I cut out another neckband and attached that by using a different method.  I doubled the band and sewed it to the neckline.  Then I pressed it and sewed again in the seam on the front to hold the seam down on the inside.  The finished band is about 5/8 inch wide.  I cut the band crosswise the knit because that had the most stretch.   

After hemming the bottom edge of the top and the sleeves, my “not a bowl of cherries top” was done.  I think you can see why this was not a bowl of cherries.  I had to spend some time ripping out and re-sewing, but I am glad I persevered!   I now have a nice aqua sweater-knit top that I will enjoy wearing.  A picture of the top is shown below.


Have you started your planning for adding items to your fall and winter wardrobe?  Have fun sewing!

Judy


Monday, July 19, 2021


From Blah to Something I Want to Wear!

What a busy summer!  It is difficult to find time to sew.  I know I am not the only one with this problem.  Everybody is busy.  There is always something that needs to be done either in the house or yard and we are always taking a road trip to somewhere.   I also have been busy getting Chicken Little Sews a Facebook page of its own and an Instagram account.  Both are up and running now. 

I did find time to sew a new top from one of the knit fabrics I purchased at Zink’s Fabric Outlet in Ligonier, Indiana a few weeks ago.  I love the print and the fabric is really soft so it feels comfortable when I wear it.  I added a strip of tricot iron-on interfacing to the bottom of the garment the width of the hem and also to the edge of the sleeves.  This will stabilize the hems and help the fabric to hold its shape.  A picture of the top is shown below.


I made another top from a light blue knit in my stash.  This top really did not want to be made.  I cut it out at least a year ago, maybe two.  I carried the pieces in my sewing bag with me to all my Wednesday sewing sessions with my friends, but I always worked on something else at those sessions.  Recently I decided to sew those pieces together.   It was a blah project.  It did not inspire me, but I pushed on with it.  Finally, a few days ago, I realized what was needed to turn that shirt from blah to something I wanted to wear.  It needed something embroidered on it.  My sewing machine also embroiders; however, I had not used that feature for quite a while.  I had to read the manual in order to retrain myself.  I spent most of a day searching for an appropriate embroidery design in my machine and then reading the manual.   At first, I was going to add the embroidery to the center front on the chest area.  At the last minute I decided to add it to the bottom to the right of the center front.  I was pleased with how the embroidery turned out.  However, there is another area of the shirt I wish looked better.  That is the neckband.  There are wrinkles in the front caused by the band not being quite long enough.    I am not willing to rip the band off and start over.  I figure I have spent enough time on this project.  It is not perfect, but I learned some lessons.  Lesson number one is to baste the neckband if you think it may not fit perfectly.  The stretch of knits varies, so the length of the band may not always be the same even if you use the same pattern.  Lesson number two is to decide if you are going to add an embroidery design before you sew the project together.  This prevents ripping the pieces apart to get the garment on the hoop.     A picture of the finished project is shown below.


A friend gave me a piece of fabric that presents a challenge for me.  My friend knows how much I love shoes.  She is aware I once made a black wool coat with appliqued shoes all over it!  She knows my weakness.  Now I have to think of something to make from this piece of fabric.  I am not sure if I can make a purse from this, but I may try.  Pictures of the fabric are shown below.


I really need to focus on starting my fall and winter wardrobe sewing.  I plan to cut out some fall projects to sew at the Lansing ASG’s sewing retreat in Shipshewana in August.  I want to use some of the fabric I bought from Zink’s.  However, I am going to give some serious consideration to what I can make from that piece of fabric Joyce gave me.  Maybe I will be able to show the finished project in my next post.

Have fun sewing!

Judy

Friday, June 25, 2021


Busting the Fabric Stash!

Have you tried to bust your fabric stash?  It is difficult!  Every time I start a new sewing project, I check my fabric stash to find fabric.  I can usually find something I want to use.  However, that is not the problem.  The problem is I keep finding new fabric that is so hard to resist.  Over the past two years, I have done well in my quest to resist buying more fabric.

Last week my husband and I drove through Ligonier, Indiana.  That is where Zink’s Fabric Outlet is located.  I have been there many times before.  Zink’s has a variety of fabric.  The stock changes constantly, so I am never sure what I will find there.  Last week I could not resist.  I asked my husband to stop and I went in “just to look around”.  I really didn’t need anything.  Going into a fabric store just to look is as dangerous for a person who has a large fabric stash as going into a bar is for an alcoholic.  

Unfortunately, in my look around Zink’s, I found a great supply of knit fabric, all kinds of knits in various weights and many colors and prints.  I lost control.  I left there with seven pieces of knits.  That means my stash grew considerably in just one stop at a fabric store!

I am going to try to redeem myself by sewing all that knit as quickly as I can.  I plan to sew 3 short sleeved tops to wear this summer and I will use the other pieces to make long sleeved tops for fall and winter.  In August the Lansing Clippers (American Sewing Guild) will have a sewing retreat in Shipshewana, Indiana.  I plan to sew some of those tops while I am there. 

At the end of May I posted about making 2 pairs of capri pants.  One of those was lime green and I discovered I had nothing to wear with them.  I had some of the lime green fabric left, so I made a top using that fabric and a piece of lime green print that was in also in my stash.  A picture of the top and pants is shown below.


I used two other pieces of fabric from my stash to make a blouse and skirt.  I made the skirt with Simplicity pattern 2186 and the blouse with Simplicity pattern 8061. 

Just so you know, sewing is not always a bowl full of cherries.  Sometimes you can create a potentially disastrous situation for yourself.  I created one of those situations when preparing to hem the blouse for the second time.  I noticed when I put on the blouse with the skirt, I did not like the look.  The blouse was too long for me.  I never tuck my blouse into the skirt's waist, so it is critical for the blouse to be the right length.  I ripped out the hem and turned up 2 1/2 inches instead of the original 1 1/4 inches.  I decided to trim the excess using the serger to cut and finish the edge at the same time.  I suddenly noticed the front of the top was caught in the hem allowance and I was cutting a large hole in the top.  My husband heard me scream and knew immediately I was in crisis mode.  He brought me two Hershey's milk chocolate kisses.

I calmed down a bit and stuck the hole together using a piece of iron-on tricot interfacing.  The hole measured 2 inches by 4 1/2 inches in the shape of a triangle on the right lower front of the blouse.  Here is what the hole looked like.


I considered placing a pocket there, but decided instead to applique some of the aqua objects from the skirt fabric to the front of the blouse.  At least I rescued the blouse.  Throwing it away was never an option for me! 
 A picture of the blouse and skirt is shown below.


I hope you are doing a lot of sewing with fabric from your stash.
  If you don’t have a stash, don’t start one.  Although it is nice to be able to sew a project without going to a fabric store, all that fabric can weigh heavy on your mind.  And it is a real challenge to try to get it all used up within your lifetime!

Judy

Sunday, June 6, 2021


Something from Almost Nothing

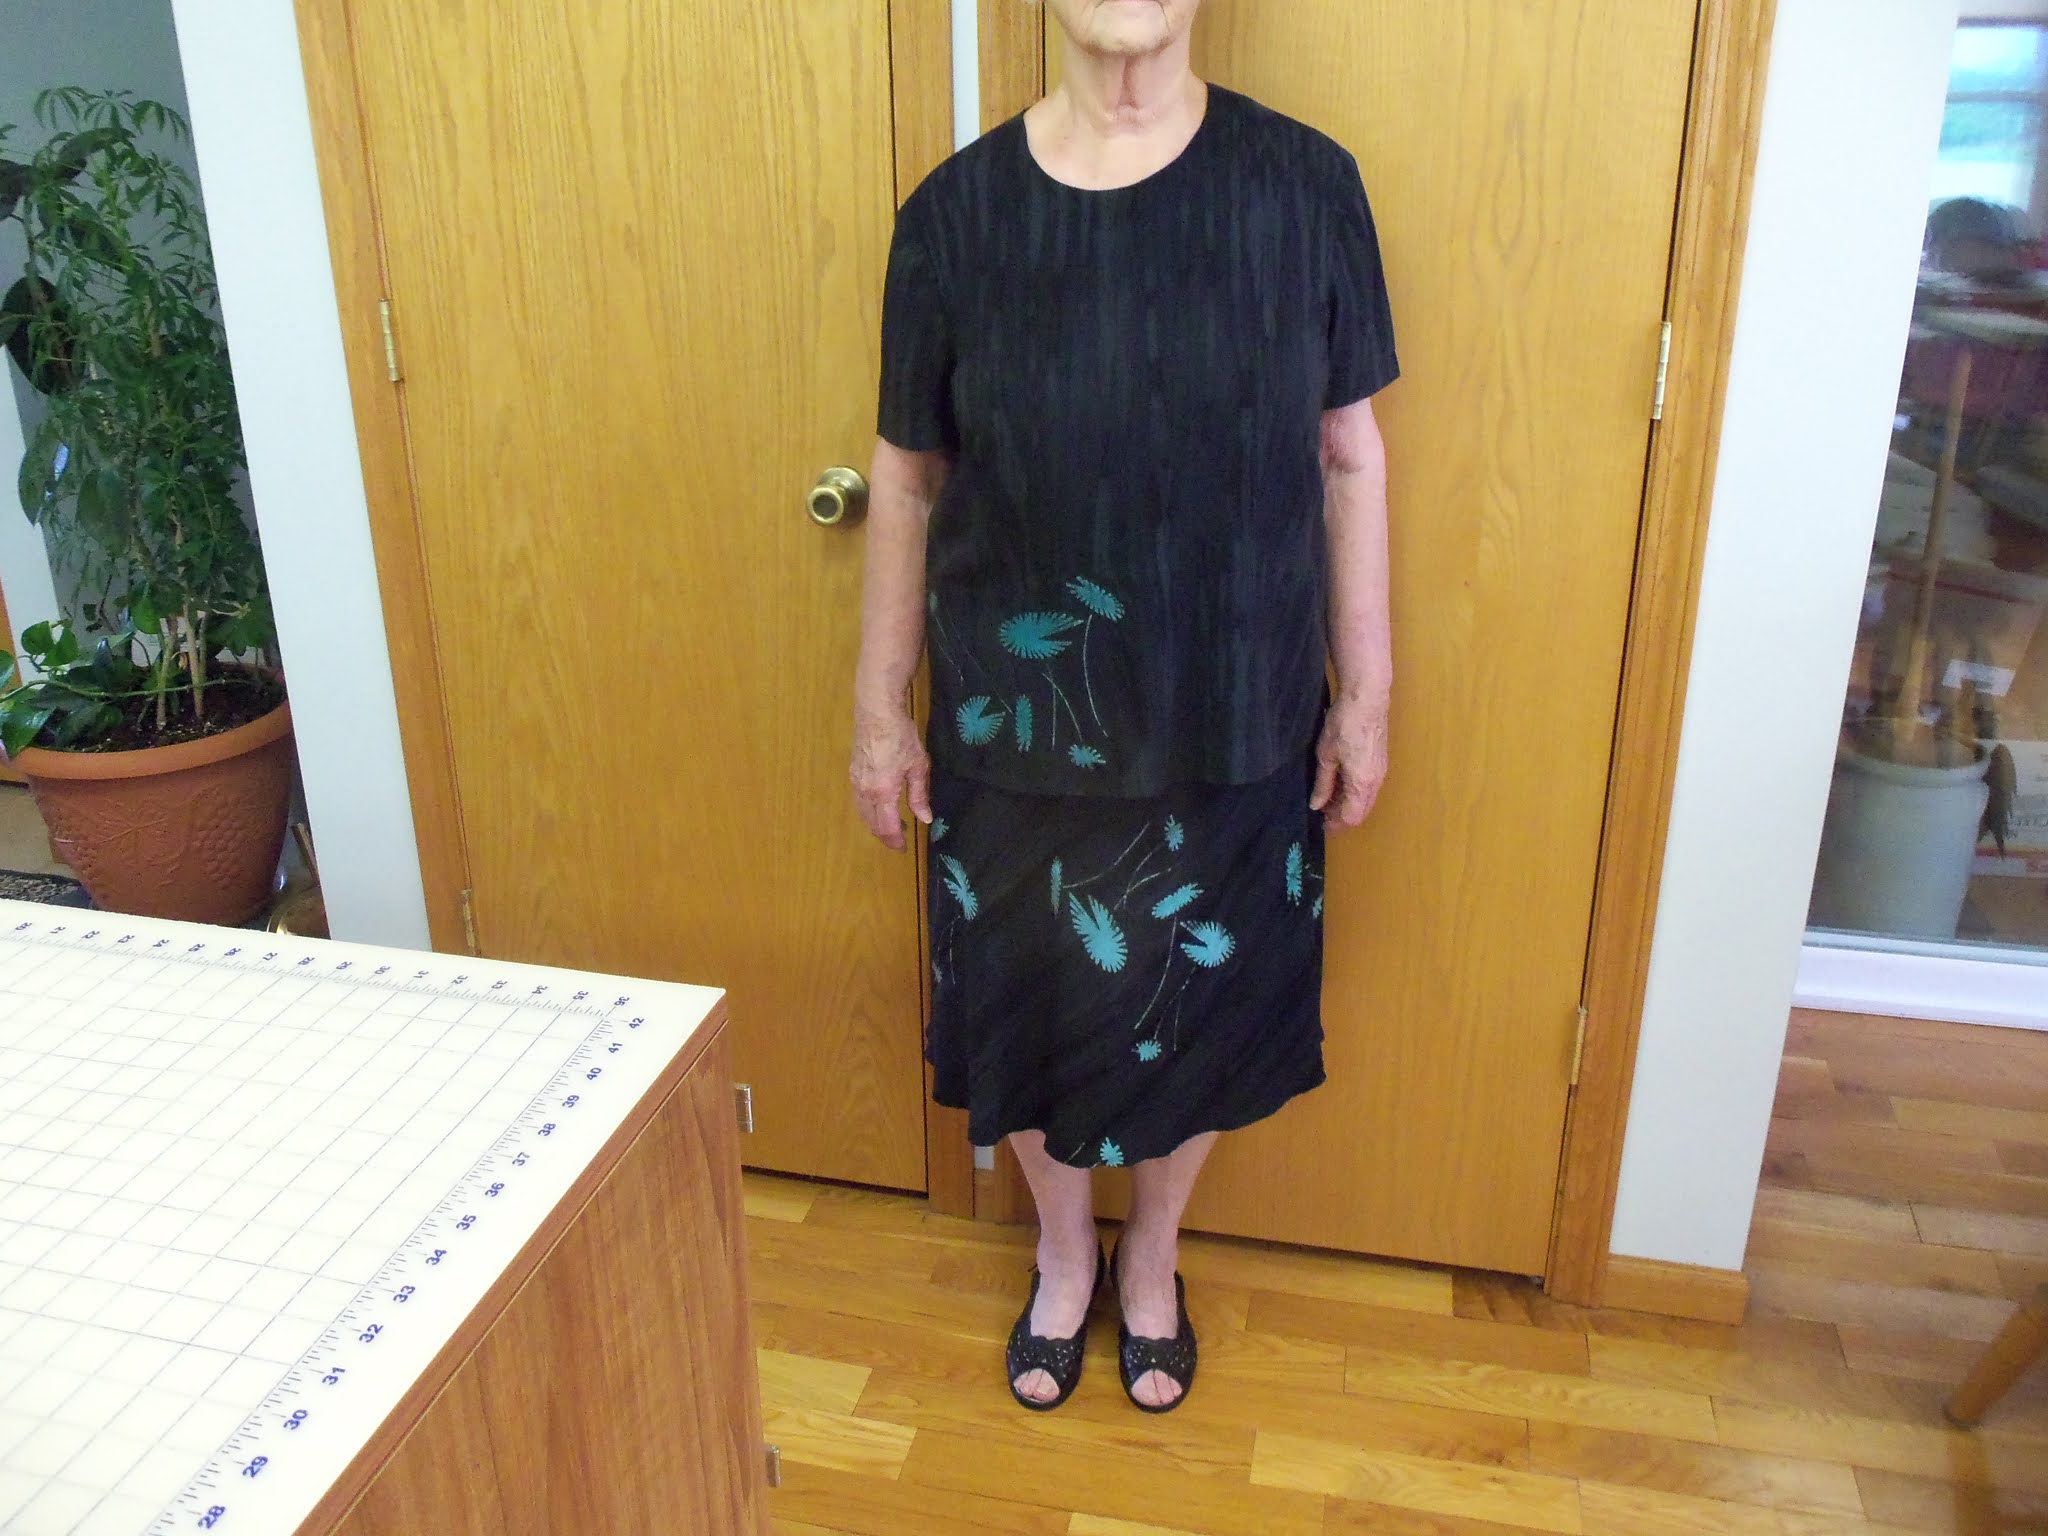
Last week I realized I needed something to wear to my grandson’s high school graduation.  I looked through my stash and found two pieces of coordinated rayon blend fabric.  One was a black background with a subtle lighter black print and the other was the same black with an aqua print.   I cut out and sewed a blouse.  It was finished Wednesday.  I started to cut the skirt on Thursday morning, but I had second thoughts.  I knew the graduation ceremony was being held outdoors in Indiana and the temperature was forecast at 93 degrees.  Maybe a black rayon outfit was not a good idea! 

I knew I had a scrap of fabric left from making a skirt about 6 or 7 years ago.  I took a look at the skirt to make sure it was still wearable and it was.  Then I looked in my stash for a light blue knit for a top.  I found just enough blue knit left over from a long sleeve tee-top I made a couple of years ago.  I decided to make an applique for the knit top from the scrap fabric from the skirt.  I love it when I can make something new to wear without making a trip to the fabric store.  A picture of the skirt and top is shown below. 

The graduation was very pleasant.  Although it was about 92 degrees Saturday, the football stands where we sat were shaded and there was a light breeze.  Most of the class of 2021 from Oak Hill High School near Sweetser, Indiana started school together thirteen years ago.  They lost a classmate in the fourth grade who died from cancer.  She was diagnosed when she was only four years old and always carried a stuffed monkey with her wherever she went.  The Class of 2021 had an extra chair in their midst in memory of her and they placed a stuffed monkey on it.  They never forgot her.

High School graduation is a really big deal.  It is the beginning of adult life for our children.  Their position in life changes.  It seems like overnight they are expected to go from being children to making life changing decisions that will affect them and others.  Their success in life depends on the foundation that was built for them by their parents, family, educators, religious leaders, and even themselves.  Now we can only hope the foundation is strong and each graduate will continue to build on theirs. 

Congratulations to all 2021 graduates!

Judy Huhn

Saturday, May 29, 2021


A Time to Sew

We are well into spring now and summer is fast approaching.  There is so much to do!  When I wake up each morning, I hardly now where to start.  It seems that everybody is busy.  Most of us went from doing almost nothing in 2020 to being overwhelmed with things that now must be done or things that we want to do just for fun.

I have had very little time to sew lately.  My regular housecleaning chores keep calling me as well as preparing for a garage sale.  We are attempting to unload our basement of all the “stuff” we keep relegating to a spot down there.  To add to all those “must do chores”, our yard keeps screaming for attention.

My husband gave me an ultimatum.  Either clean the flower beds or get rid of them.  I knew at my age and in my current physical condition, I wasn’t going to be able to do the work.  I decided to call Smith Lawnscapes in St. Johns.  I discovered that getting rid of the flower beds would be expensive, so I decided I might as well try to save them.  Smith Lawnscapes did the hard work for me.  They did the weeding and pulled out the dead or just plain ugly plants.  All we had to do was purchase the plants and pay for Smith’s services.  After visiting approximately 15 greenhouses in both Michigan and Indiana, we had all the replacement plants.  Smith Lawnscapes returned and put in the new plants and pulled more weeds.  They did a great job and now our yard looks a lot better.  The best part is they will return once a month to keep things looking good!

The decision to hire a lawn service was difficult for me to make.  I don’t relish the idea of having someone else clean up my mess, but I know my limitations.  I also want some time to sew and this will give me time to do that. 

I remember the book, 10-20-30 Minutes to Sew, by Nancy Zieman.  Nancy advised sewers to set aside small units of time and work on small increments of a sewing project.  In one of those time slots, you could gather the supplies, prepare your pattern, cut out the project, mark the pieces, add interfacing, or sew seams.  The idea is to do one thing at a time.  You don’t need to complete the project during one session at your sewing machine. 

We all have 24 hours a day.  If we want to spend some of that time sewing, we need to allocate time for it and be ready to sew.  It can be done.  It is nice if you have space where you can leave your project out and ready to sew when you have another “sewing allocated” period of time.  That way you don’t waste any time setting up to sew.  Even if you have to put your project away, if you keep everything together, you can use those small increments of time to work on a project.

Many years ago, I walked each morning with two of my neighbors before getting ready for work.  I told them I was making my daughter’s wedding gown and the gowns for her maid of honor and bridesmaids.  Both Lynda Roof and Judy Boettger offered to help.  We were all busy, but we decided to give up our morning walks and instead use that time from 5:00 a.m. – 6:00 a.m. to work on the gowns.  I had sewing machines and a serger set up each morning with everything ready to sew.  This worked and was so much fun!  I have really great neighbors.  We all still live in the same neighborhood and I will always be grateful for their help. 

Although I haven’t had a lot of time to sew recently, I have finished two projects.  Pictures of the items are shown below. 


I made the lime green capris from fabric given to me by a member of the American Sewing Guild, Colleen Bofysil.  A couple of years ago, I made a skirt from the same piece of fabric.  I still have another length of the same fabric, but am not quite sure what I will sew from it.  Maybe I will make a coordinating jacket for the skirt and capris pants.

Save some time to sew and have fun doing it.  Remember, if you can only sew a few minutes, those minutes will be enough to eventually complete a project.  This is definitely better than not sewing at all!

 Judy


Tuesday, May 4, 2021


It Is Almost Here!

It is coming!  I can feel it.  I can almost see “normalcy” on the horizon.  The snow has gone.  Spring has sprung and people are beginning to meet each other outdoors and in very small groups indoors.  I know we aren’t there yet because Michigan’s Covid-19 numbers are still high, but there are encouraging signs.  I think we are well on the way to a better year than the one we just experienced. 

I am looking forward to the return of our regular in-person sewing guild meetings.  I want to see the projects everyone has made and not view them over zoom.   I want to view live demonstrations of sewing techniques without struggling to view them on-line.  Our Zoom meetings have been better than not having meetings, but there is nothing like a real in-person gathering of sewing enthusiasts. 

The Lansing Clippers’ charity sewing project for this year is the same as last year.   We are continuing to make clothes for babies and toddlers to give to the Infant and Children’s Closet at Pilgrim Congregational Church in Lansing.  Recently, I focused on making items for this charity.  I needed something simple to sew after all the fitting and pattern hacking I had done for my last few posts.   I told myself I would do some “mindless sewing”, but mindless sewing is not a real thing.  All sewing takes concentration, even simple sewing.  Yes, the patterns I used to make the children’s clothing were simple, but I still had to focus on what I was doing.  For example, after I finished the purple shorts, I noticed that I made a mistake when I finished the edge of one of the side seams.  As I serged the edges of the seam, I caught part of the shorts under the serger needle and serged it into the seam.  Fortunately, that part of the shorts didn’t get under the serger knife, so I was able to rip it out and re-serge the seam.  A picture of the garments is shown below.


As part of the simple sewing, I also made some baby items to be used as a shower gift.    I made 3 small bibs, 3 larger bibs, 3 burp cloths, and a couple of receiving blankets.  This would be a good project to start if you haven’t sewn in a while and just want something simple to do to get back into sewing again.  As I said before, no sewing is really mindless sewing but there are a lot of simple projects you can sew.  A picture of the baby items is shown below.


If you need a project to sew, just google whatever you have in mind.  There are all kinds of projects with on-line instructions just waiting for you!  Sewing can be relaxing and fulfilling.  It is also a hobby that can be shared.  Sewing with a friend is twice as fun as sewing alone.  You can learn from each other and creativity seems to flow easier when you can collaborate with others.  Even if you can’t get together with others yet, make some plans to sew with others as soon as the conditions allow. 

Have fun sewing!  If I can answer any questions for you, please let me know.

Judy 

Wednesday, April 21, 2021

                                                     Button Down the Front V-Neck Blouse

I decided once again to hack the pullover top with a back slit opening made from Simplicity 8061.  I wanted to use that pattern to make a button down the front v-neck blouse.  A picture of the completed blouse is shown below.


I fitted the original pattern (Simplicity 8061) last December and blogged about the process.  Since that time I have done pattern hacks to it to make other styles without having to fit a new pattern each time.   A picture of Simplicity 8061 is shown below.


To make this hack, I needed to make changes to the front pattern piece and to the front neck facing.  I could make a separate sew-on facing or add one onto the front pattern piece.  I decided to add the facing to the front.  The front neck facing would need to cover the v-neck front opening and extend down to the hemline of the blouse.  I began by tracing the front pattern piece from the Simplicity 8061.  I measured down on the center front and marked where I thought I wanted the low point of the v-neck to be.  I measured 5/8 inch up from that point for the seam allowance.  I took a ruler and tried to draw the sides of the v-neck, but I did not like the results.  Instead, I used a French curve and drew a gentle curve up from the v-point to the shoulder line.    

Next, I needed to add some space to the center front to accommodate the buttons and buttonholes.  This space would become the overlap of the front.  I drew a line 3/4 inch from the center front that ran from the neckline down through the hem.  The picture below shows the front pattern piece after making adjustments for the new neckline and front opening.

The next step was to draw the front facing.  I taped another piece of paper to the pattern because there was not enough room to draw the extension for the front facing.  I folded the paper on the line I drew for the overlap space for the buttons and buttonholes.  After I folded the paper, I could still see the new line for the neck opening.  I traced the neck opening and also along the shoulder line for 2 ½ inches.  I measured out 4 inches from the beginning of the overlap line at the V-point and marked the spot.  Then I measured out 2 1/4 inches from the overlap line at the hem and made a mark.  I made another mark  two and one-quarter inches from the overlap line directly across from the bust dart.  I drew a line from the mark at the hem up to the mark across from the bust.    I drew a curved line from there up to the mark at the center of the neckline.  I used a French curve to draw a line from there up to the mark on the shoulder line.  My front neck facing pattern was complete.  

The first picture below shows the pattern paper folded over the front piece and the lines drawn for the facing.  The second picture shows the entire front piece after the addition of front facing.   


The next picture shows the pattern piece for the interfacing.  As you can see, I just placed pattern paper over the pattern and drew the facing beginning at the center front line of the pattern.  I could have started at the overlap line, but by starting at the center front, it will give the button hole and buttons area a little extra support.  


I found a piece of fabric in my stash that was 54 inches wide.  It is a “linen-look” fabric that I like because it does not wrinkly easily.  Also, I was able to fold the fabric lengthwise and it was wide enough to cut the two front pieces.  I found that if I folded 45-inch wide fabric lengthwise, it was not wide enough to accommodate both fronts.  If I use the pattern with 45 inch wide fabric, I will have to lay the fabric in a single layer and cut each front individually.  Of course, the other option would be to cut the facing separately from the front piece with the addition of a seam allowance on both pieces.

This was an easy pattern hack to make.  It was just a matter of thinking through the process of making the front facing and allowing room for the buttons and buttonholes.  After I cut out the blouse, I put it together as I would any other blouse.  After I sewed the back facing together, I attached it to the front facing and then sewed both facings to the neck edge.  After adding the sleeves, it was simply a matter of hemming the blouse to complete it. 

After you have a pattern that fits, it is so much easier to hack that pattern to make different styles rather than keep fitting a new pattern each time.  So far, I have made four tops from this pattern.  They are shown below.


I hope you have fitted a pattern for yourself and are busy doing pattern hacks to make a complete summer wardrobe.  Have fun sewing!  I appreciate your comments or questions.  If you have either, please let me know.

Judy